[Apollo] Quick Start Manual
Apollo
Apollo is an open-source autonomous vehicle software platform developed by Baidu
Helpful Links
Homepage: https://apollo.auto/
GitHub: https://github.com/ApolloAuto/apollo
YouTube: https://www.youtube.com/channel/UC8wR_NX_NShUTSSqIaEUY9Q
System Environment Setup
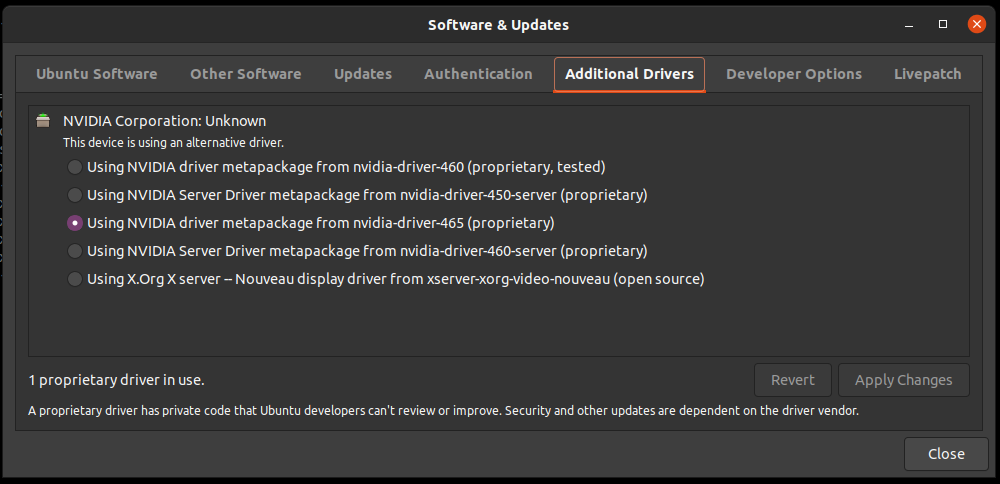
Install or check current VGA/GPU drivers on your Linux system.
Run the Software & Updates menu
Find the Nvidia drivers that apply to your system, select Apply Changes, and install.
An RTX 2080ti card or better is recommended to ensure performance.

From the terminal, use the command nvidia-smi to confirm the installation.

Setting up MORAI SIM for Apollo
MORAI SIM currently supports Apollo for a single map and vehicle type. Further support for additional maps and vehicles is in development.
Initialization
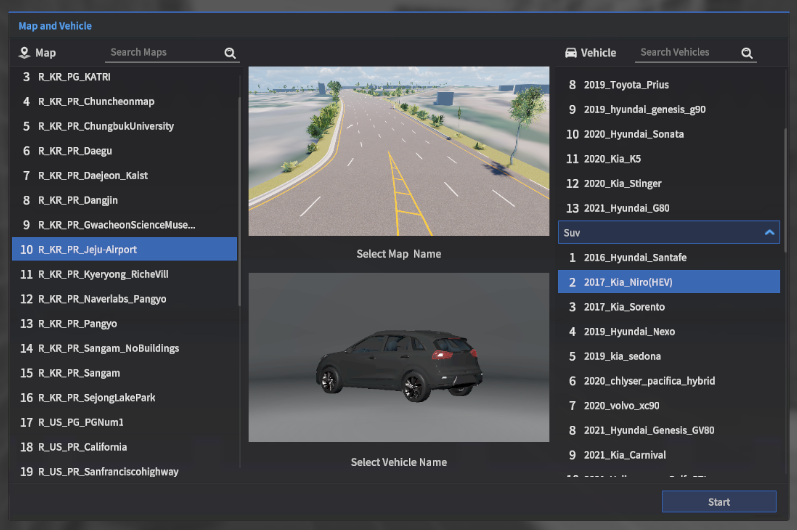
From the MORAI SIM Map and Vehicle selection screen, choose the R_KR_PR_Jeju-Airport map and 2017_Kia_Niro(HEV) vehicle model.
MORAI SIM Network Settings
As the simulator is not connected to anything during setup, it is recommended to manually set the vehicle to Park so it doesn’t creep off the road.
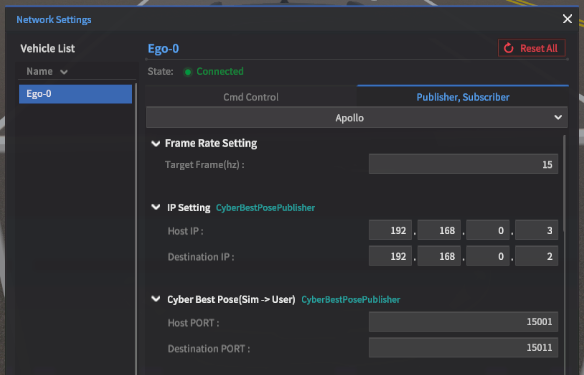
Frame Rate Settings:
Target Frame should be set to 30 for the purpose of this guide
IP Settings:
Can be set for both the Host and Destination IPs.
If running Apollo on a single machine, set both IP addresses to 127.0.0.1.
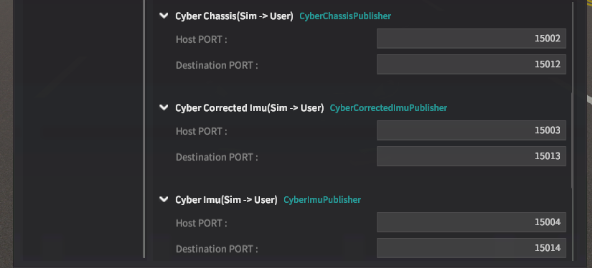
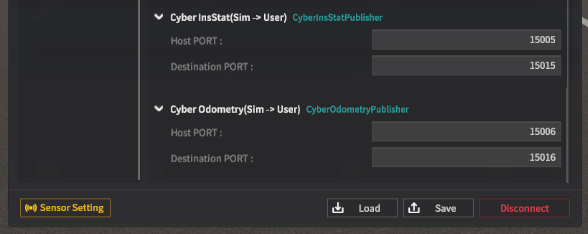
Use the PORT number below without modification.
After the set-up, click Apply to apply it.
After the set-up, press the "P" button on the keyboard to switch to the Parking mode.
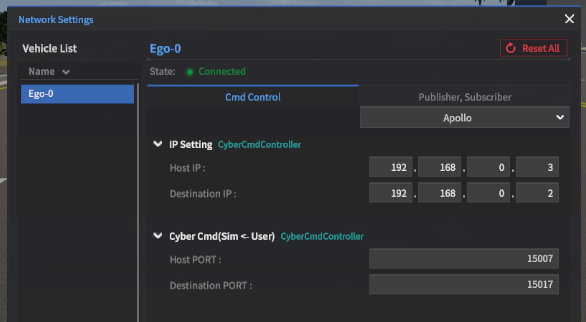
Cmd Control Settings
Set the Host and Destination IPs as shown.
Publisher, Subscriber Settings
Set the signal frequency (Frame Rate), IP addresses, and port numbers as shown.
GT data
obstacles, traffic light

Running Apollo
아폴로에 관한 자세한 설명은 아래 URL을 참고 한다.
https://github.com/ApolloAuto/apollo/tree/master/docs
Environment Setup
Cloning the Apollo project from the Github repository
Clone the master branch from the main Github repository.
Installing Docker
Once the repository is cloned, install Docker using the
install_docker.shshell script.cd /apollo/docker/setup_host chmod +x install_docker.sh ./install_docker.sh sudo groupadd docker sudo usermod -aG docker $USERCODE
Installing NVIDIA Container Toolkit
distribution=$(. /etc/os-release;echo $ID$VERSION_ID)
curl -s -L https://nvidia.github.io/nvidia-docker/gpgkey | sudo apt-key add -
curl -s -L https://nvidia.github.io/nvidia-docker/$distribution/nvidia-docker.list | sudo tee /etc/apt/sources.list.d/nvidia-docker.list
sudo apt-get -y update
sudo apt-get install -y nvidia-docker2
sudo systemctl restart docker
CODE
Entering Apollo Docker
Enter the following command prompt in
$APOLLO_ROOT_DIRThe wired internet connection should be installed to execute dev_start.sh shell file.
./docker/scripts/dev_start.sh
./docker/scripts/dev_into.shSetting up the Apollo Bridge
Use the bridge files attached below to replace the contents of the
apollo/modulesdirectory.
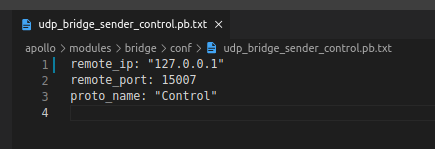
Network Settings
The bridge is set by default to send any control command messages to the IP address
127.0.0.1.If the simulator is located on a different computer, the remote_ip must be changed to the IP address of the simulator.
Connecting Map Data
Insert the line of code shown below to the end of the global flag file located at
apollo/modules/common/data/global_flagfile.txt.--map_dir=/apollo/modules/map/data/jejuCODEPlace the map data file attached in this guide in
apollo/modules/map/data/
Connecting Vehicle Data
Place the vehicle data file attached in this guide within
apollo/modules/calibration/data
Parameter Setup
Place the settings text file attached in this guide within
apollo/dreamview/conf/hmi_modes
Building Apollo
Finally, run the shell script command below to build the Apollo package.
./apollo.sh build_opt_gpuCODE
Connecting MORAI SIM to Apollo
Communicating with MORAI SIM
Launch the bridge to connect Apollo to the simulator.
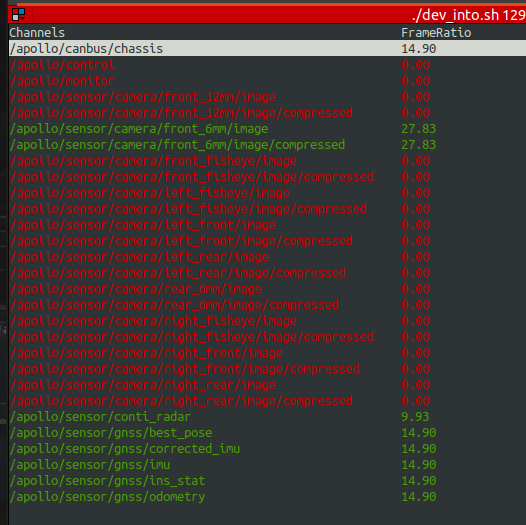
cyber_launch start modules/bridge/launch/morai_bridge.launchCODEUse the cyber_monitor command to run the monitor to confirm that signals are being sent.
cyber_monitorCODE
Run the Dreamview
Type the following command prompt
./scripts/bootstrap.shSet the Dreamview configuration
After entering the dreamview execution code, use chrome to enter "localhost:8888" into the address bar.
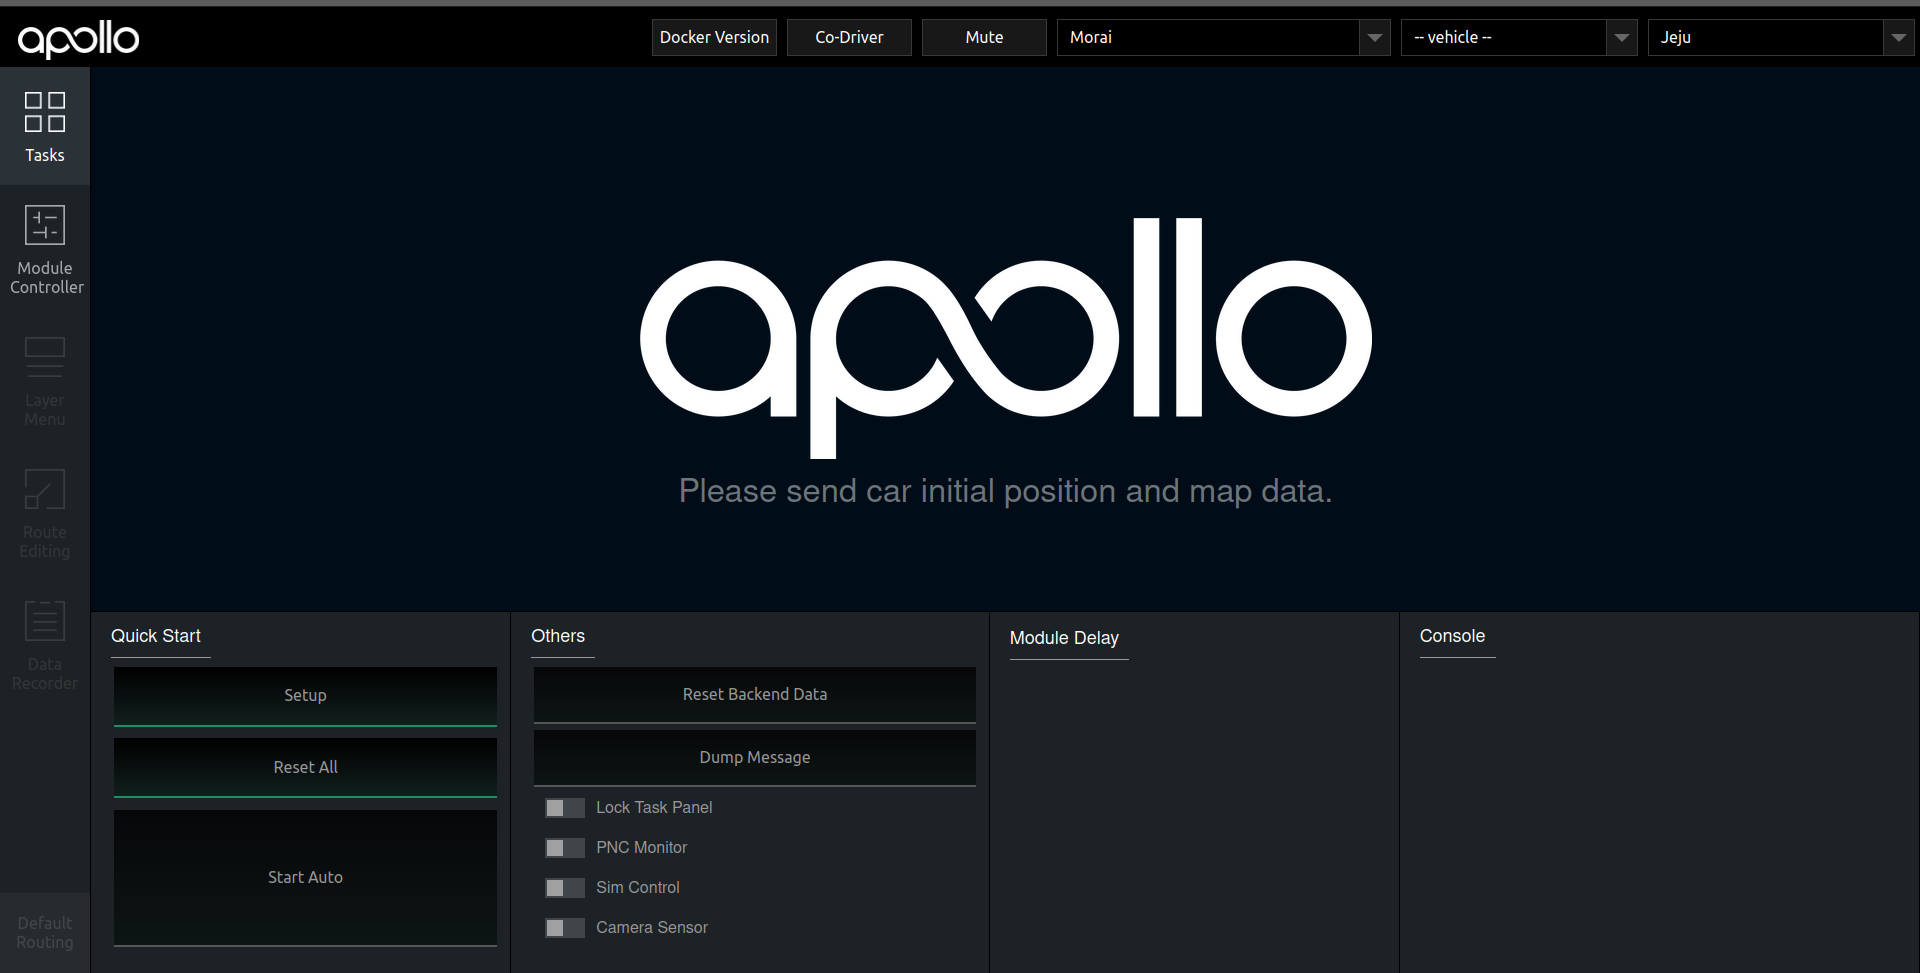
If you have checked the screen above, use the setting window on the upper right to set it as shown below.

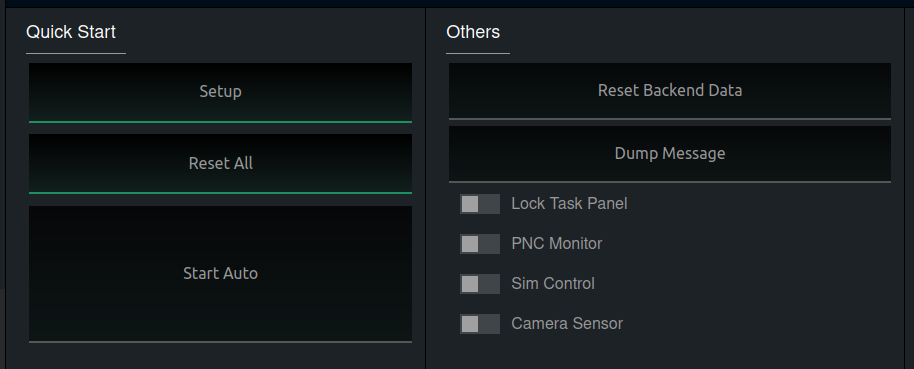
In the Quick Start window, click Setup.
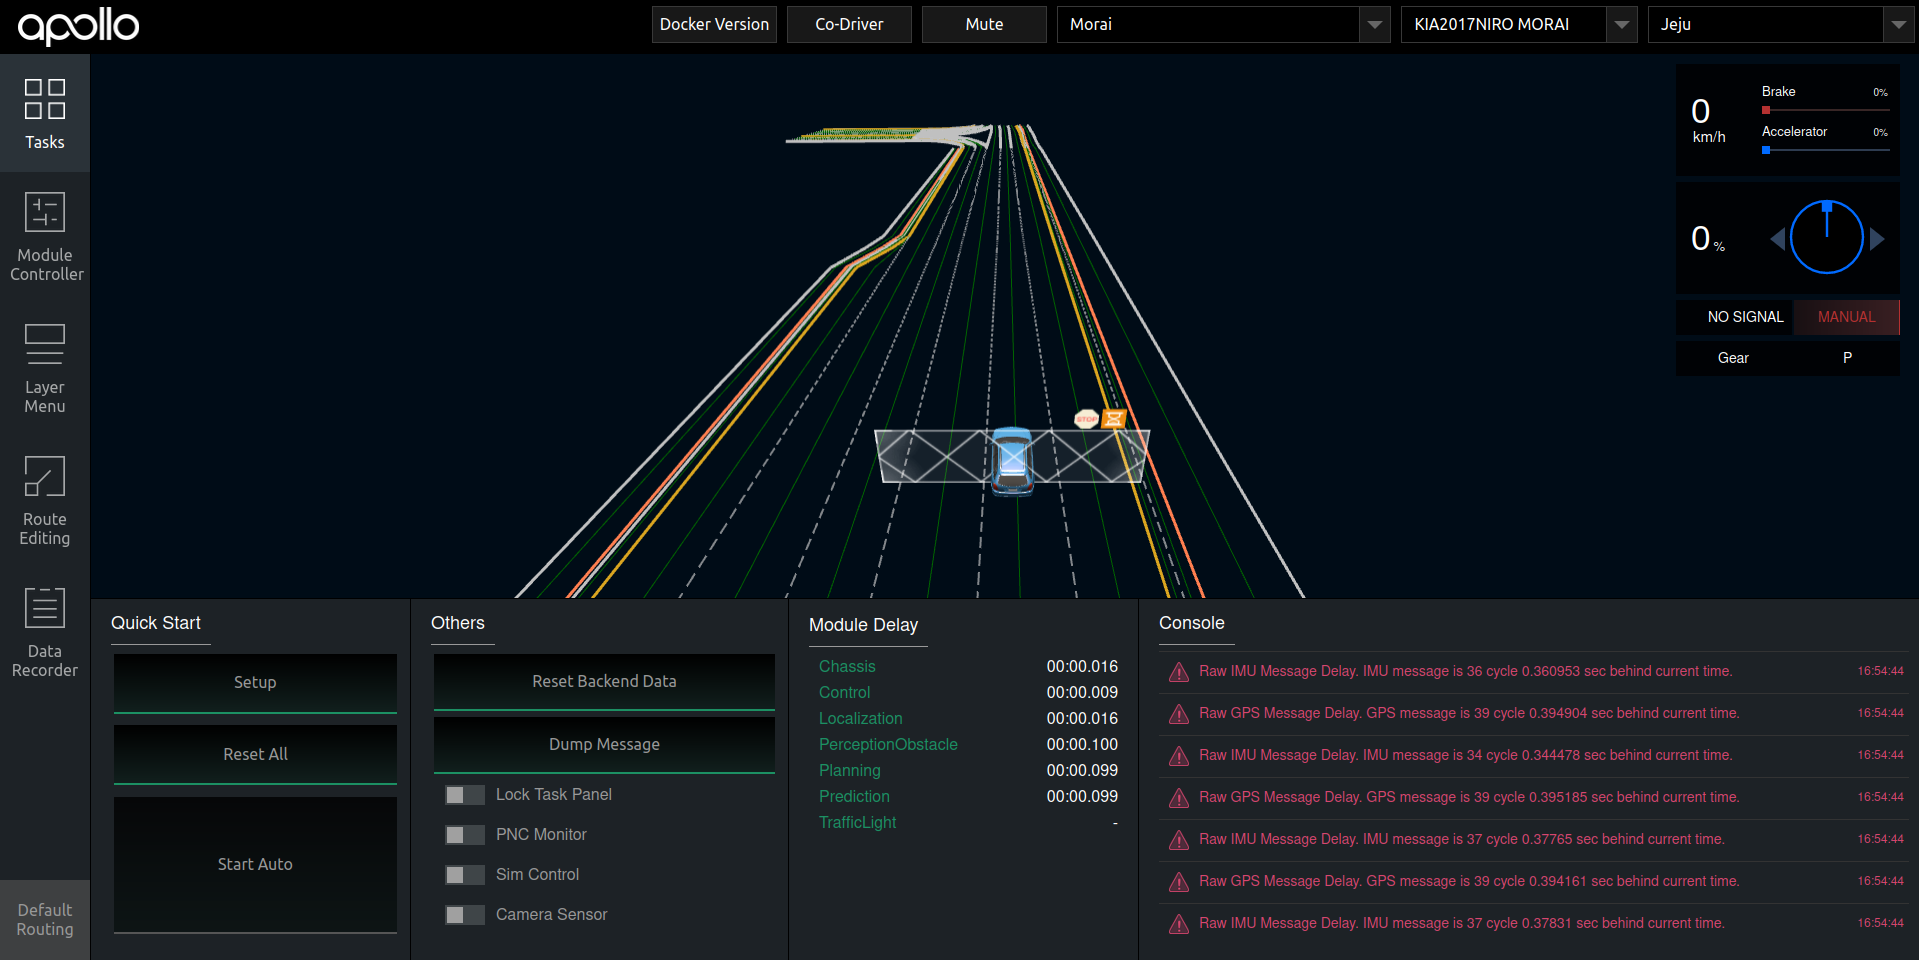
You can see that RTK Localization is as follows:
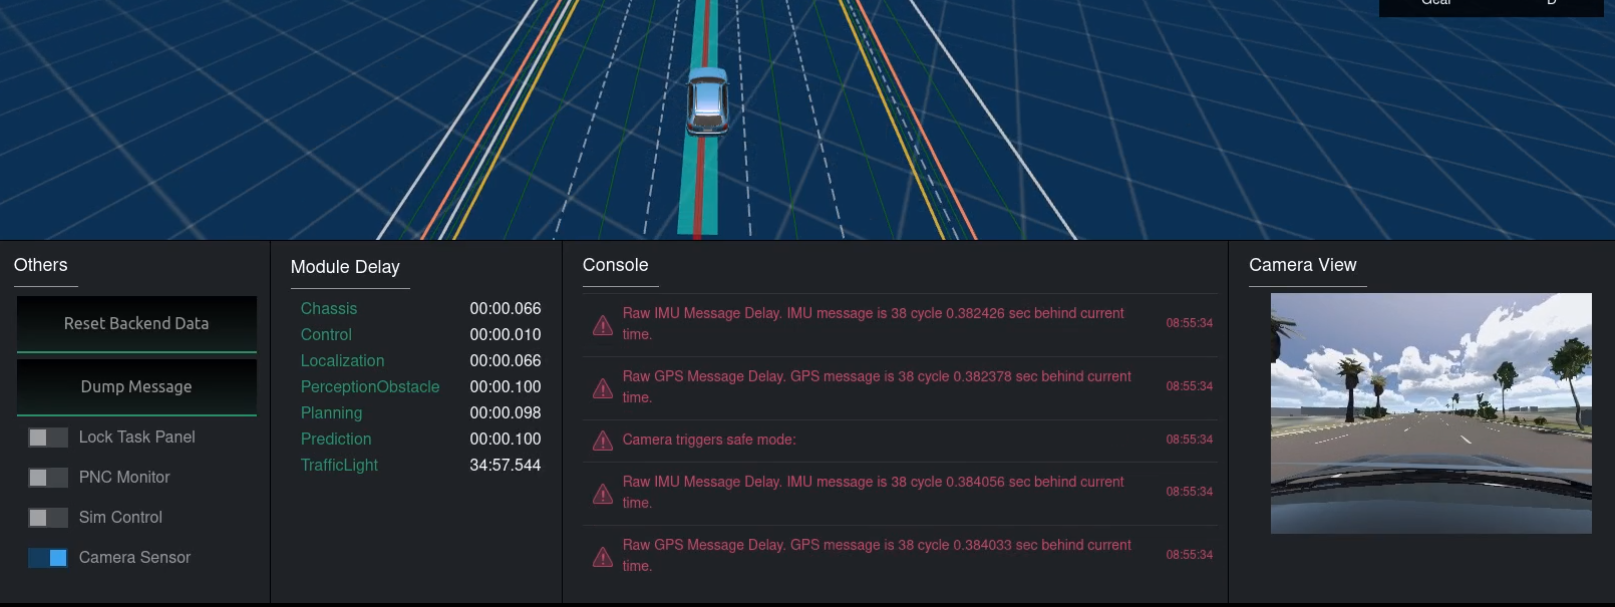
Camera
You can check the Camera View by activating Camera Sensor in the Others window.
Route Setting
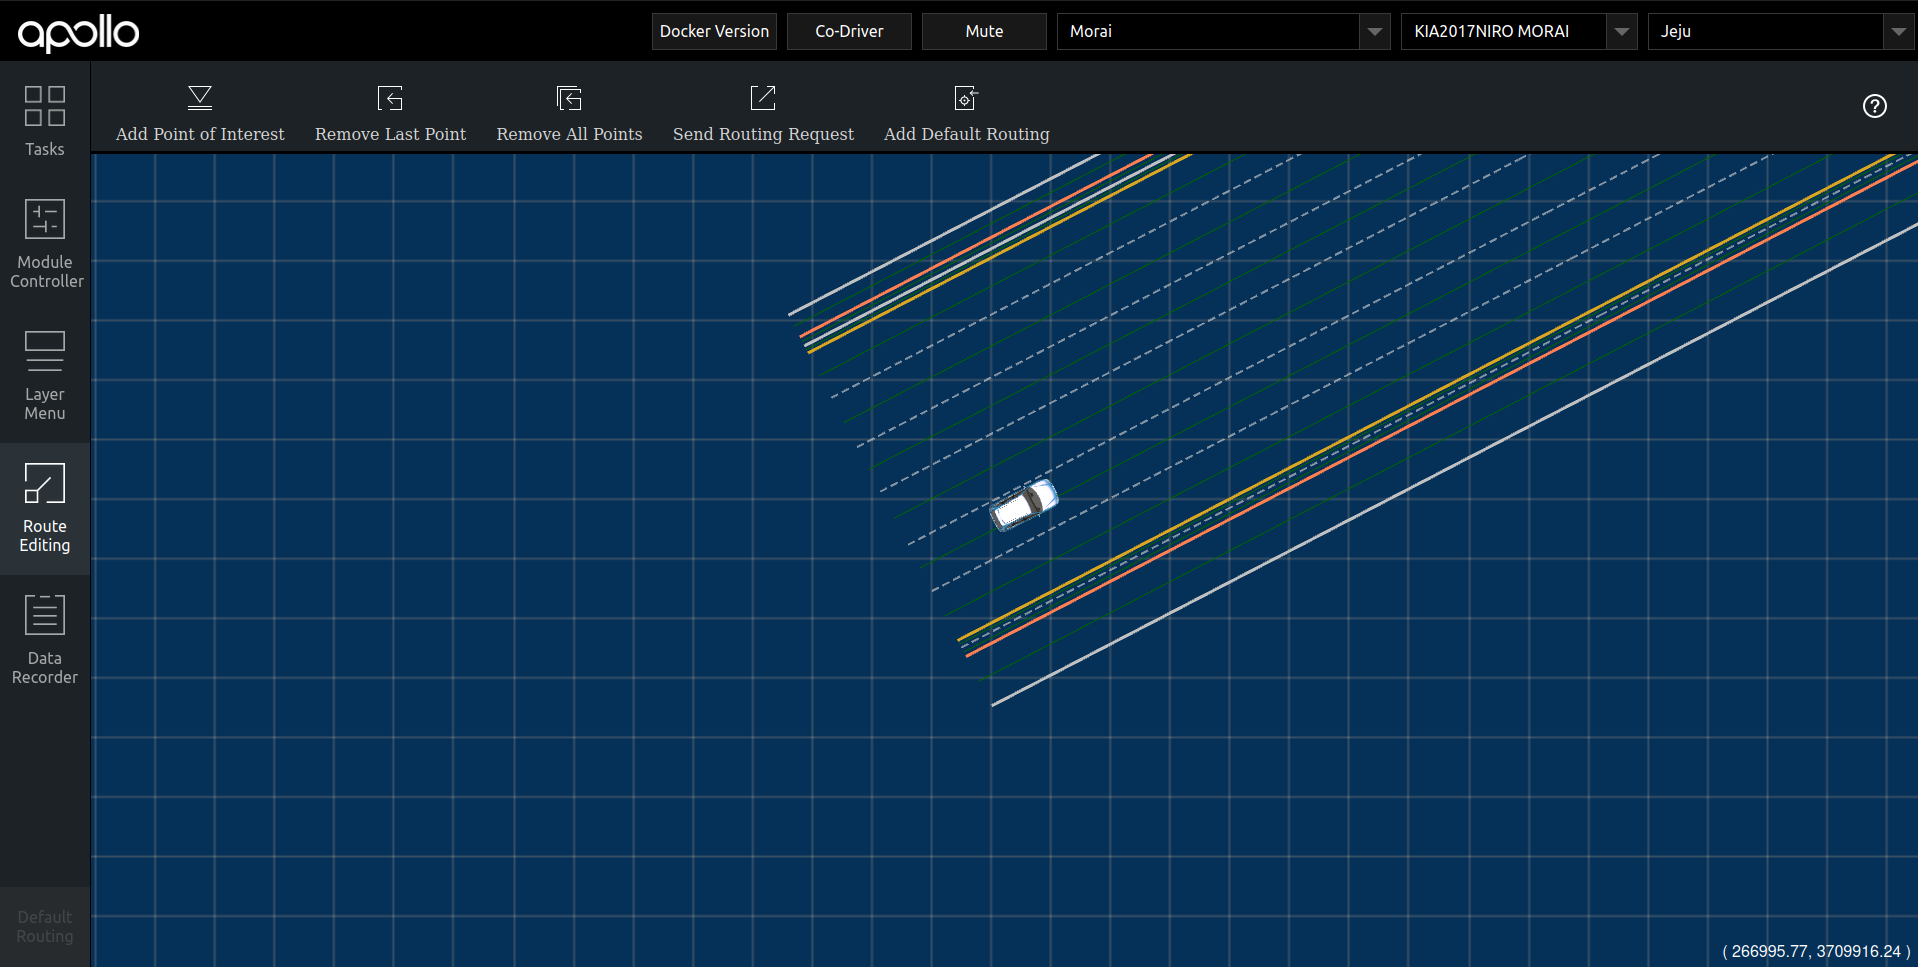
Select Route Editing on the left-hand side.
Click the screen as below.
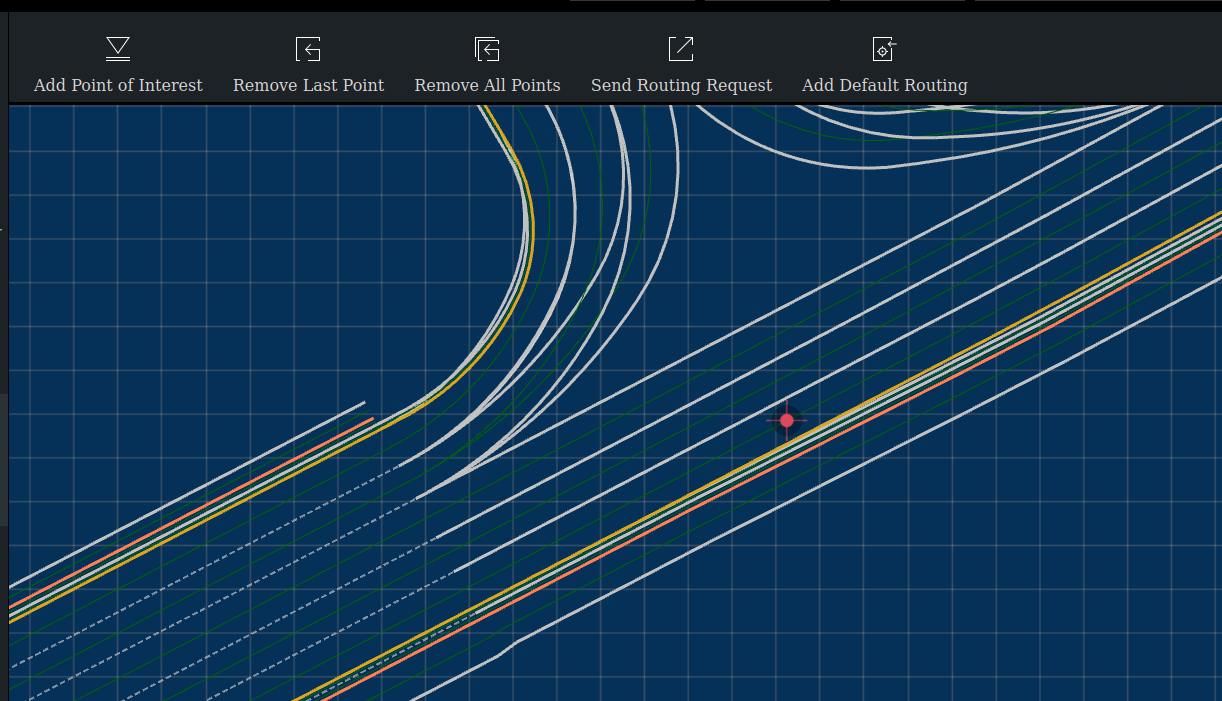
Use the wheel of the mouse to reduce the map, select the desired target point, and click "Send Routing Request" at the top.
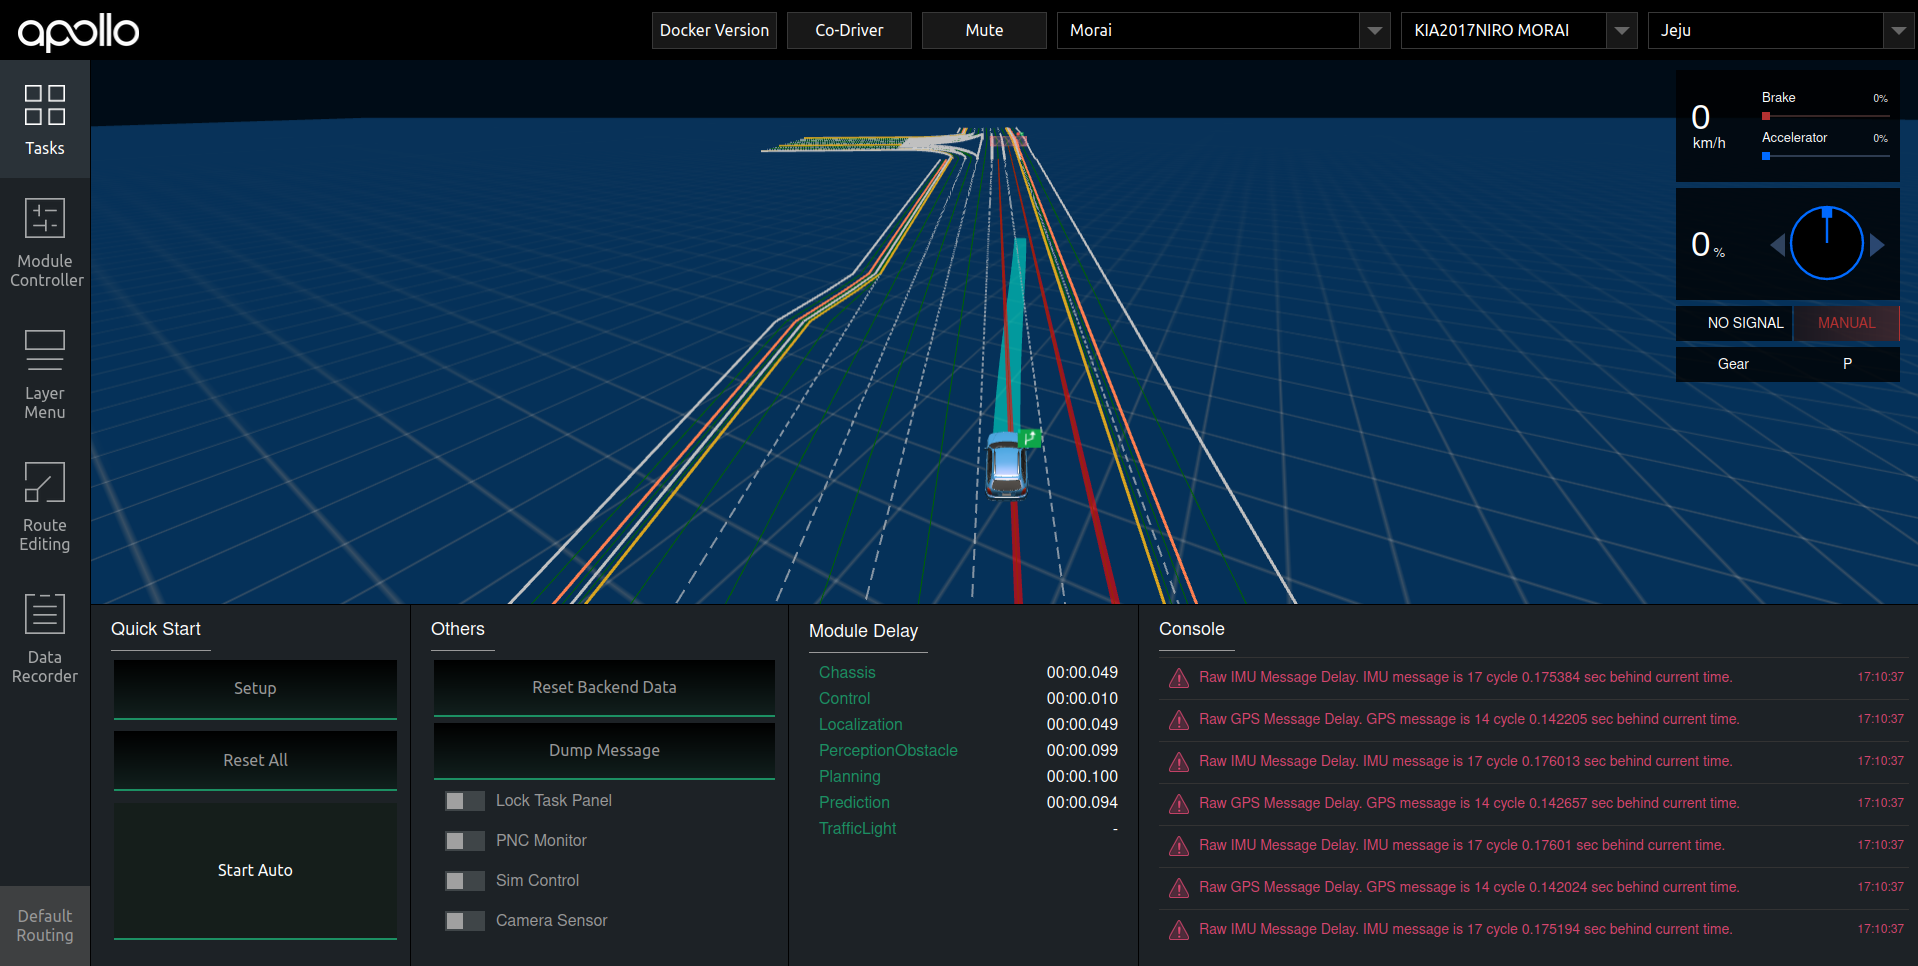
Again, select "Tasks" from the menu on the left to confirm that the path has been created.
Return to Morai SIM and click the "q" key on the keyboard to change to self-driving mode.
Verify that in Dreamview, Morai SIM mode, the object is going to the target point.
Driving Video
https://api.media.atlassian.com/file/e0e21d36-4708-42dc-9ccb-f3119d6d4b9b/artifact/video_1280.mp4/binary?client=30fe19e0-ed84-4201-9800-705ca0ef53a6&collection=contentId-42008577&max-age=2592000&token=eyJhbGciOiJIUzI1NiJ9.eyJpc3MiOiIzMGZlMTllMC1lZDg0LTQyMDEtOTgwMC03MDVjYTBlZjUzYTYiLCJhY2Nlc3MiOnsidXJuOmZpbGVzdG9yZTpjb2xsZWN0aW9uOmNvbnRlbnRJZC00MjAwODU3NyI6WyJyZWFkIl19LCJleHAiOjE2MzA5MDk3NzMsIm5iZiI6MTYzMDkwNjgzM30.Klt4pb2wpT1goH-mFZCGLccDA1pDYP-2lp0yvcKoaEQ
Sensor setting
Lidar
Add Lidar to the desired position.
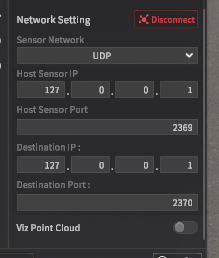
Lidar sends to UDP because it is implemented to receive from Apollo to UDP.
After setting up Lidar, set the Host IP and Destination IP to suit your network.
Port is set by referring to the Apollo conf file below.
After setting up, click the "Connect" button to connect.
Apollo Setting
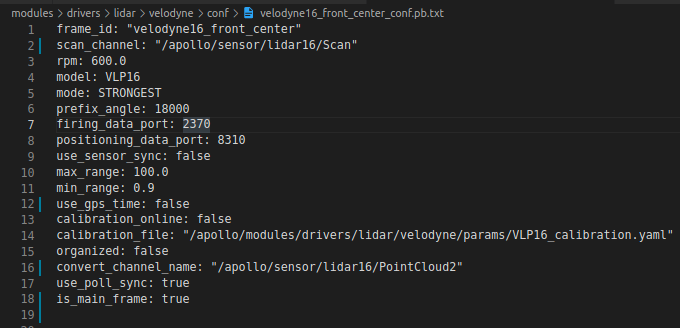
Refer to the file of “modules/drivers/lidar/velodne/conf/velodyne16_front_center_conf.pb.txt”
Make "firing_data_port" and Morai SIM's "destination port" the same.
Change "use_gps_time" to true → false.
Change "is_main_frame" to false → true.
Change “scan_channel” to /apollo/sensor/lidar16/Scan
Change “convert_channel_name” to /apollo/sensor/lidar16/PointCloud2
If you want to receive other lidar, refer to the "conf" file and change it to fit.
Check the Lidar Interconnection
Run the components by using the command line prompts regarding velodyne16
cyber_launch start modules/drivers/lidar/velodyne/launch/velodyne16.launchCODESimilar to Camera, it can be checked using “cyber_visualization”.
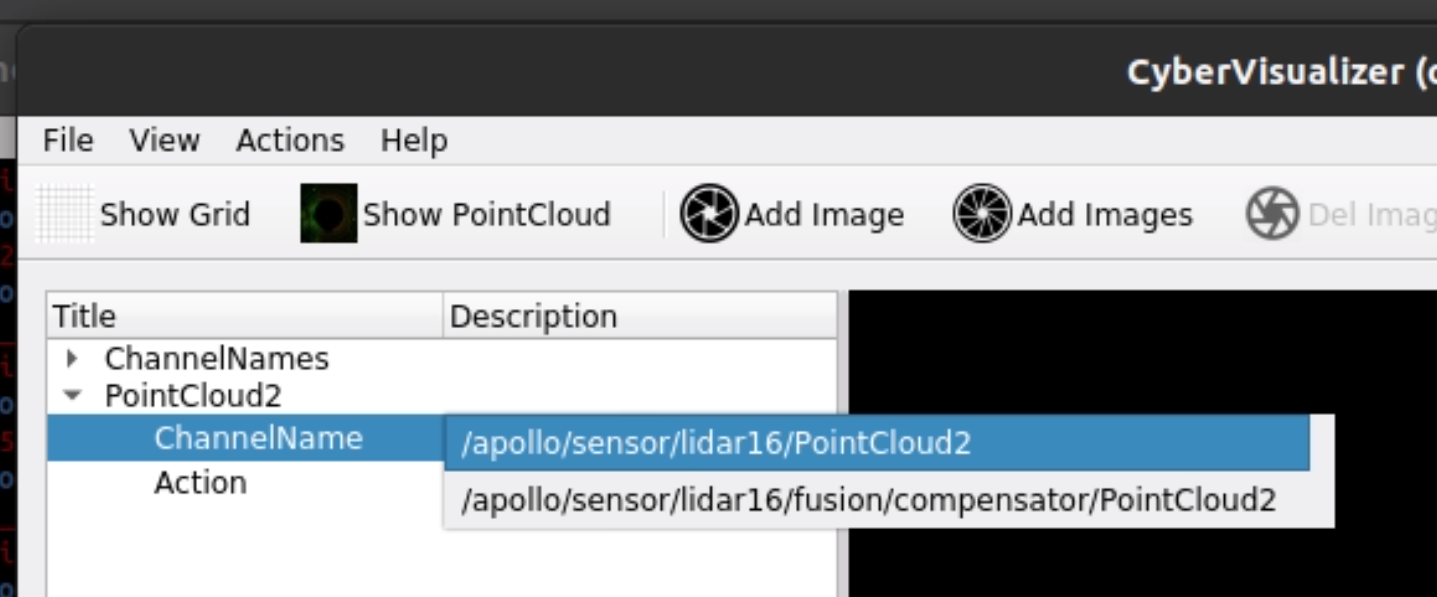
Click the "Show PointCloud" button at the top to create a "PointCloud2" channel.
Select "ChannelName" and select "/apollo/sensor/lidar16/PointCloud2".
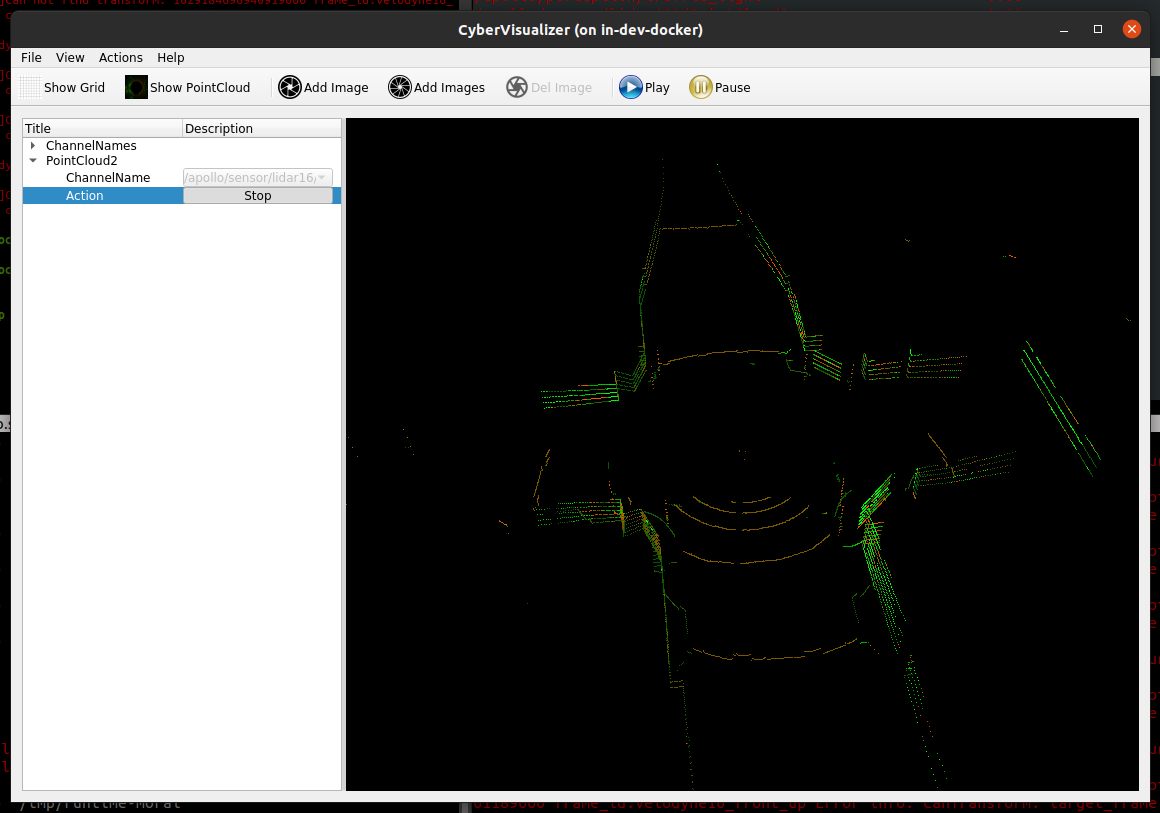
Check the output of PointCloud as shown below.
Radar
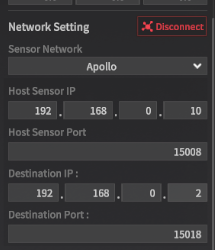
Add Radar to the desired position.
After setting up Radar, set the Host IP and Destination IP to suit your network.
Set the port number as Host Sensor Port : 15008, Destination Port : 15018
After setting up, click the "Connect" button to connect.
Camera
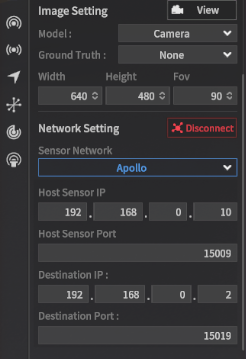
Add the camera to the desired position.
After setting up the camera, set the Host IP and Destination IP according to your network.
Host Sensor Port : 15009, Destination Port 15019 로 설정 한다.
After setting up, click the "connect" button to connect.
Recommended use 640 * 480 or lower
Communication might be lost if Sim Frame is below 30
Run Camera bridge
cyber_launch start modules/bridge/launch/morai_bridge_camera.launchCODE
Check Camera connection
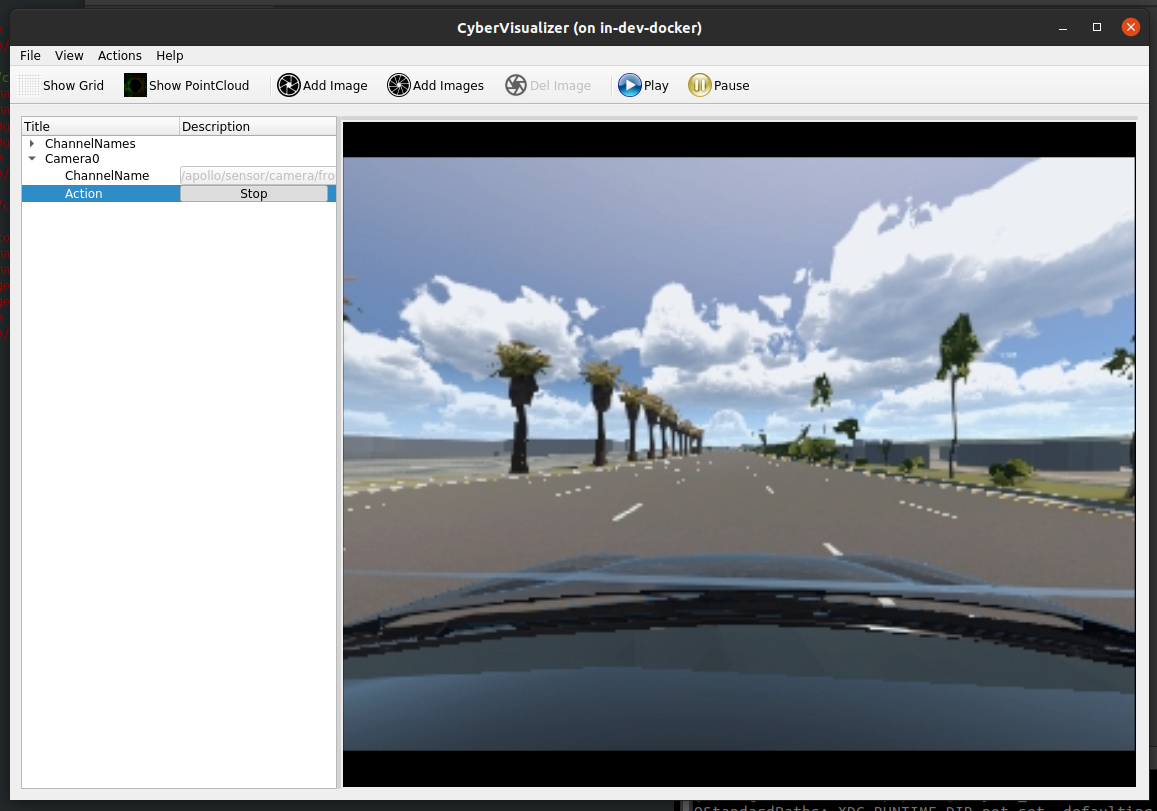
Enter the "cyber_visualizer" command in the cmd window
Click "Add Image" to add a camera
Select Camera() channel and tune it into “/apollo/sensor/camera/image”, and click the “Play” button.

Camera image normal output check
