Actors and Obstacles
The Scenario Menu
The Scenario menu allows the user to edit the simulation scene by adding dynamic actors (vehicles, pedestrians) and static obstacles (traffic cones, guardrails). Any user-created scene data can be saved and later loaded from memory.
Access this menu by going to Edit >> Scenario >> Scenario Edit Mode.
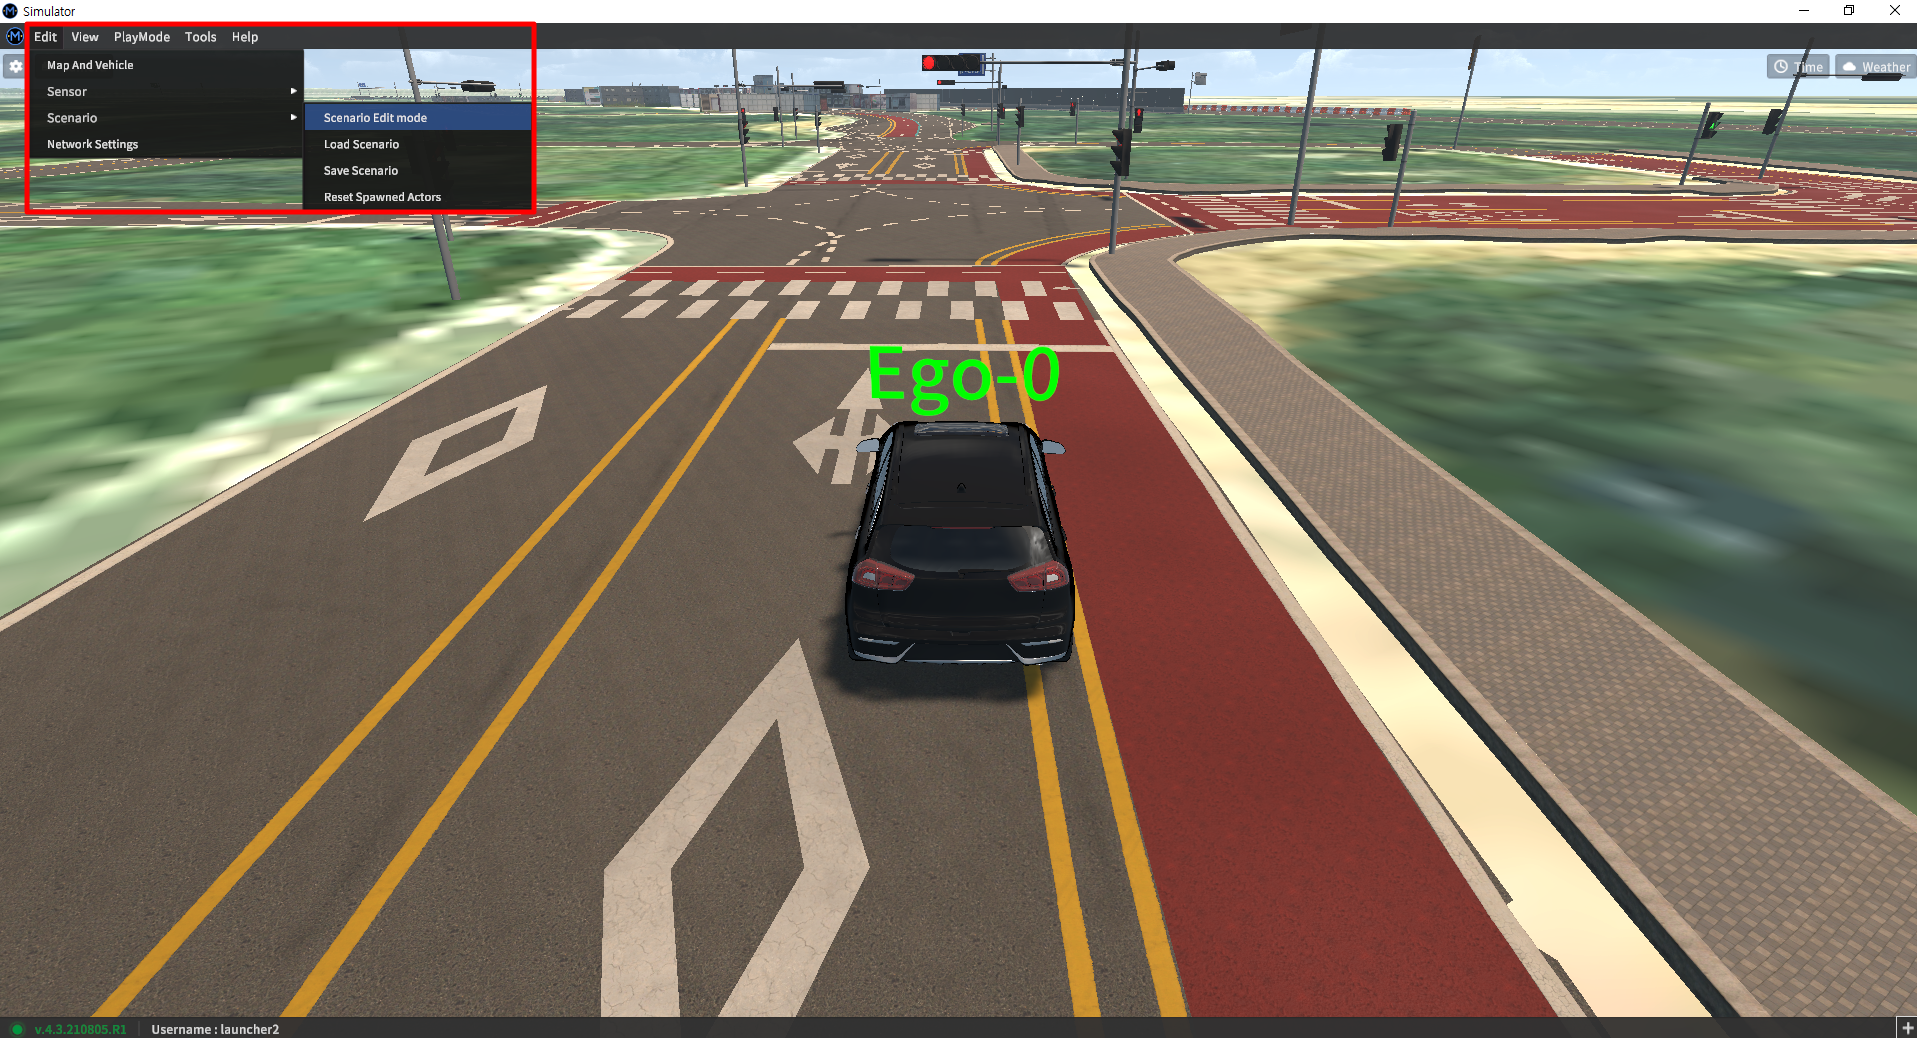
The Scenario menu has a number of options to choose from.
Edit Mode: Brings up the scenario editor - any dynamic actor or static object can be added within the graphic user interface.
Save & Load: Save the current configuration or load previously saved scenarios.
Reset Spawned Actors: Used to reset the scene by deleting any active dynamic actors or static objects in the current scene.
Using the Scenario Editor
Moving the Camera
While in editing mode, hold the right-click button on the mouse, then move to adjust the view of the camera. Unlike in the sensor editor, the camera is not focused on the ego-vehicle.
Use the mouse wheel to zoom in (scroll up) and out (scroll down).
The WASD keys on the keyboard move the camera through the scene.
The Q/E keys on the keyboard raise and lower the camera.
Use the camera options to switch to Top View Mode - this automatically moves the camera into a top-down position for easy object placement.
Basic Controls
Left Click a dynamic actor to select it.
Selecting a dynamic actor will bring up a separate Setting or Info window. The Setting/Info window can be used to change actor variables such as position, rotation, or target velocity.
Alt+Left Click a dynamic actor to delete it from the scene.
Placing Vehicles
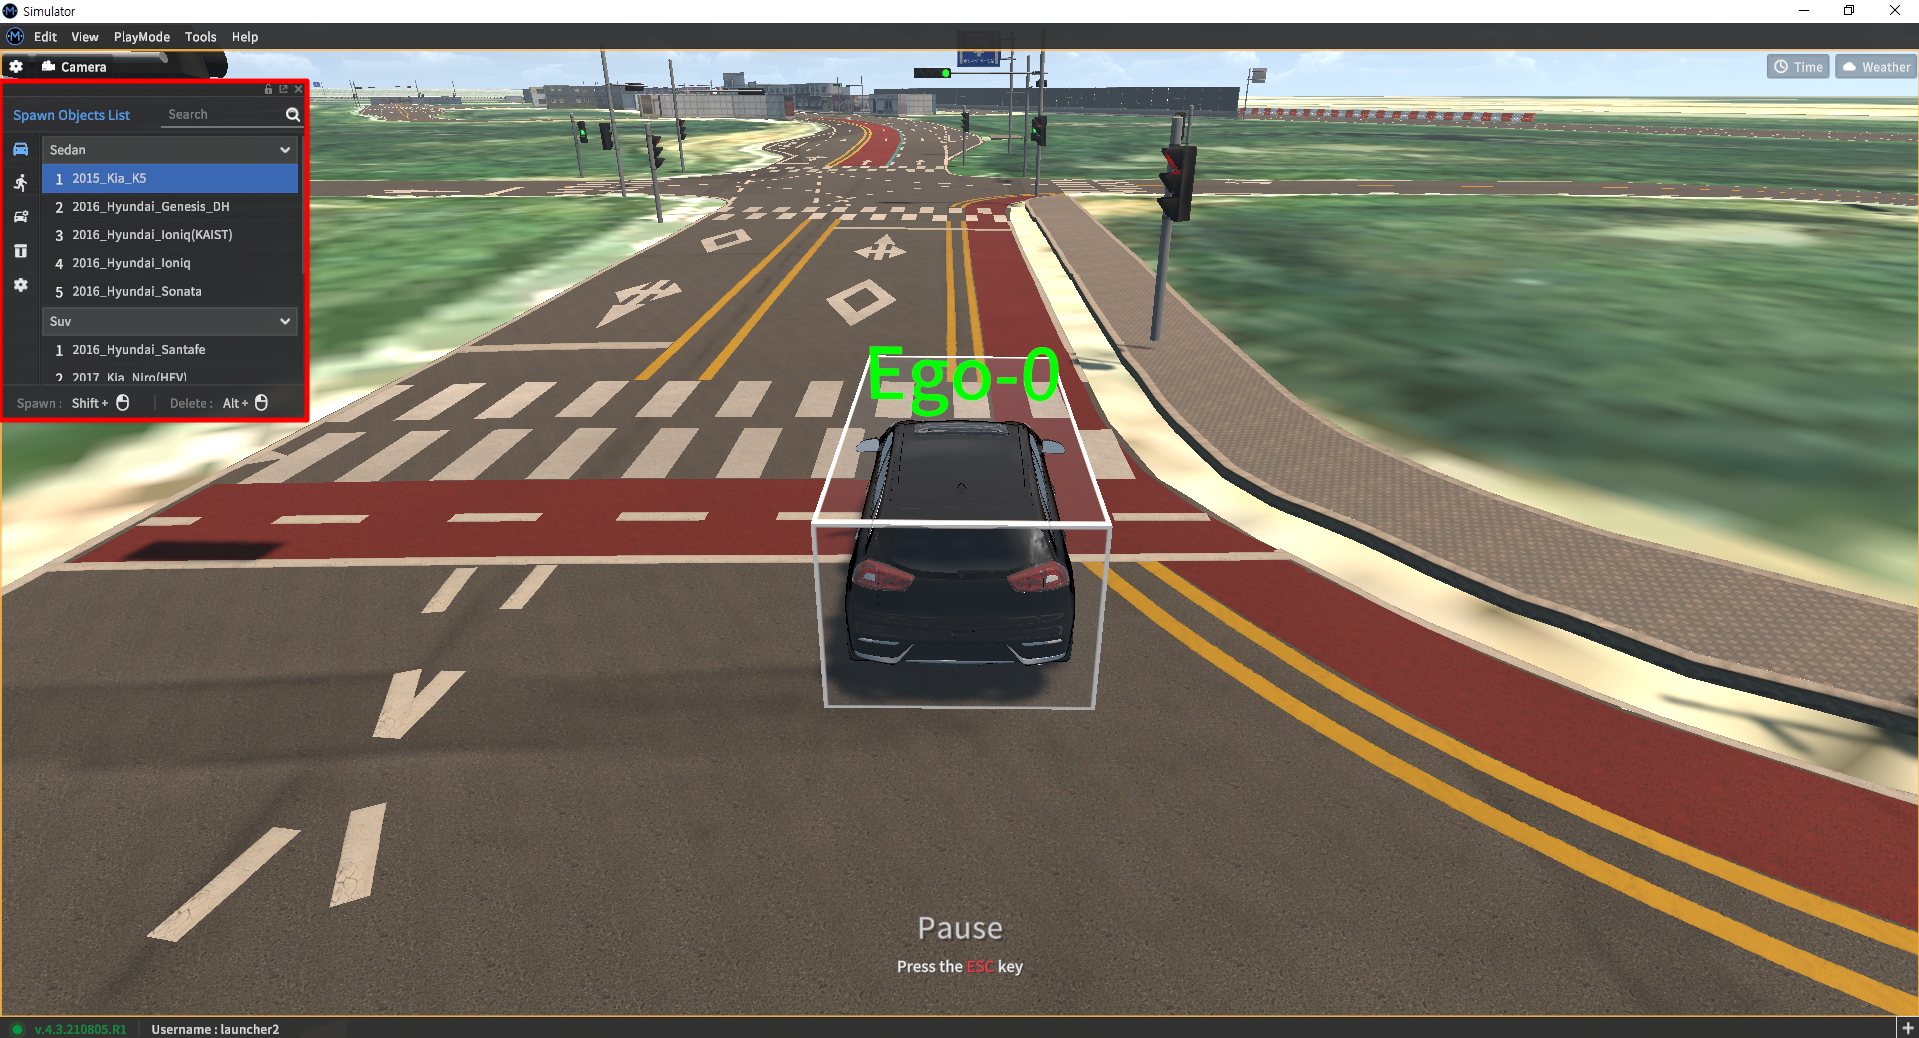
While in editing mode, select the vehicle subclass, then select a vehicle type from the Editor window on the left.
While a vehicle type is selected, Shift+Left Click along a road to place the vehicle. Vehicles will automatically align to the center of a road and rotate to match the direction of traffic.
While selected, Left Click+Drag a vehicle along the roads to move the vehicle.
Placing the vehicle on roads without such properties will trigger a warning message.
Traffic/Surrounding vehicles may only be placed on roads with logical link connections. These links are necessary to determine the lane center, road direction, and lane change maneuvers.
Reference Video
Placing and Controlling Pedestrians
Single Pedestrian
Select the pedestrian subclass from the Editor window.
Shift+Left Click to place a pedestrian model at the desired location, Alt+Left Click to delete a pedestrian.
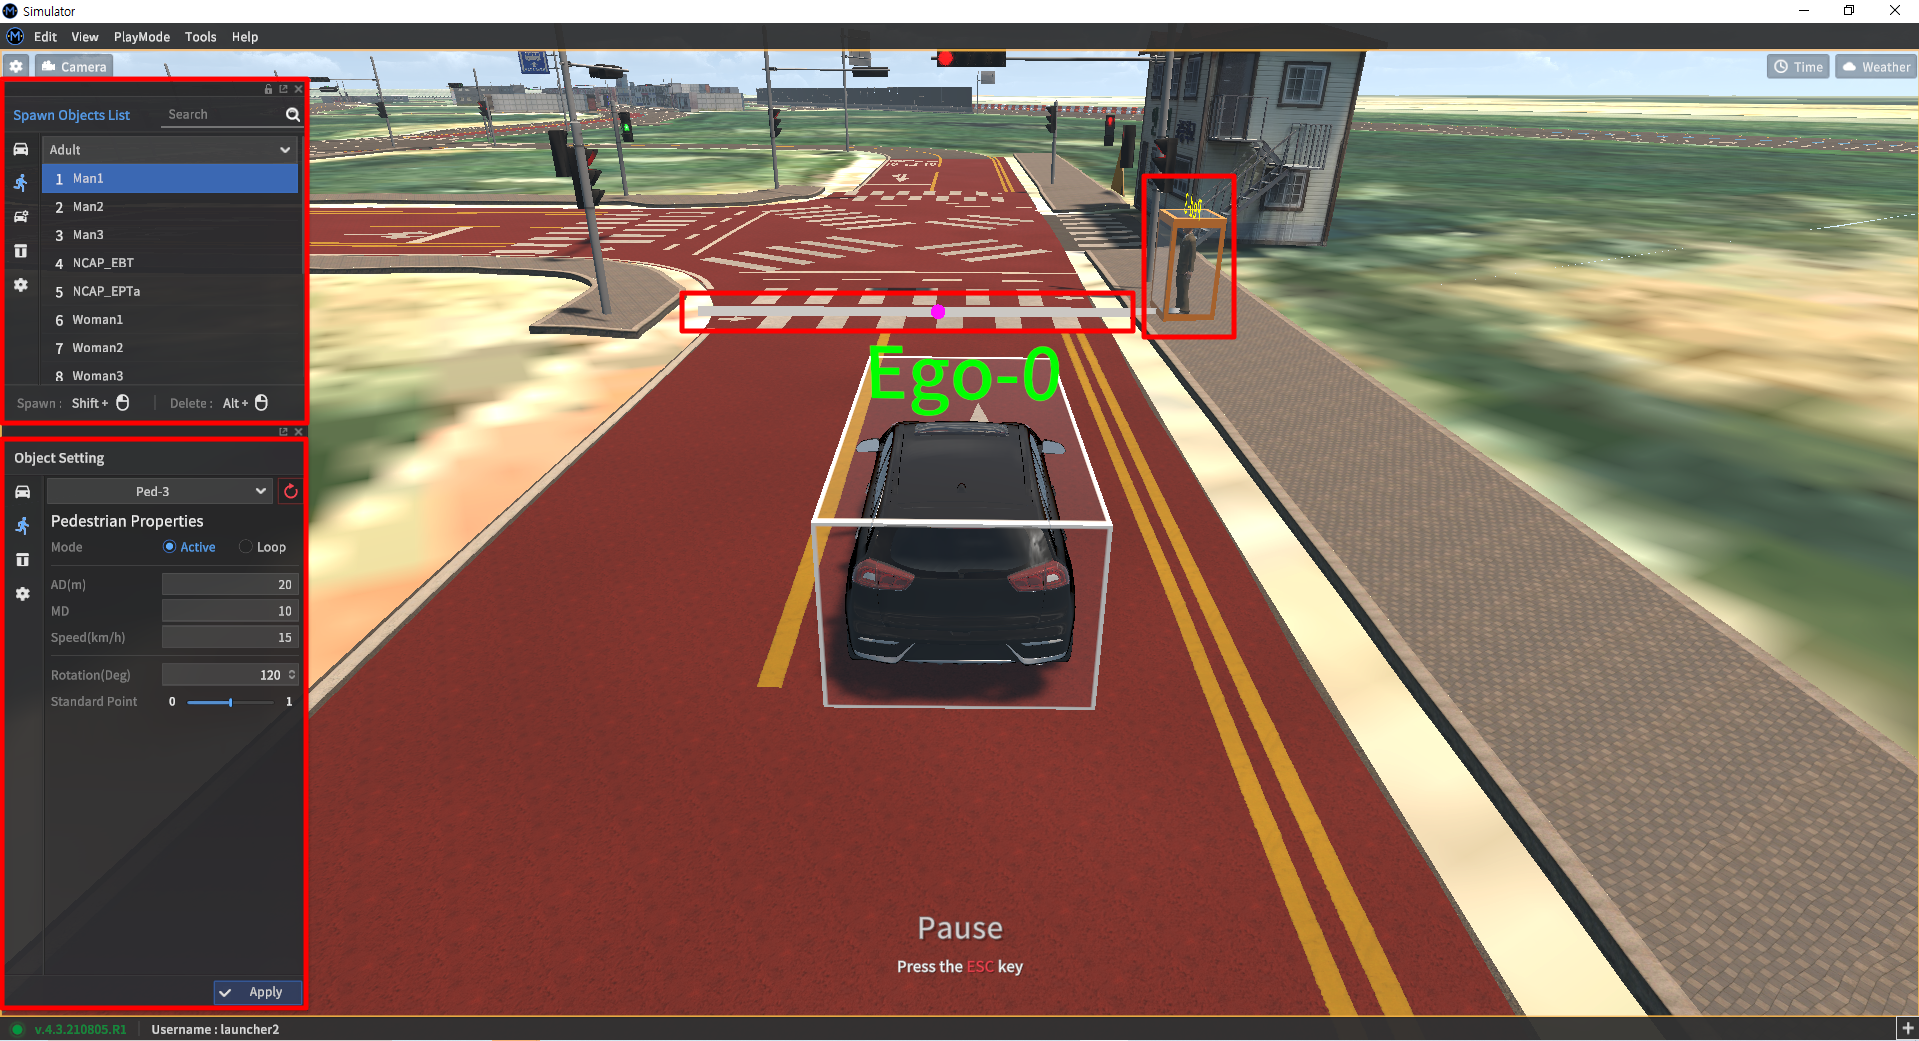
Selected pedestrians will also show their movement trajectory - shown as a line in front of the pedestrian model. This is the path the pedestrians will walk/run when their movement is triggered. The movement trajectory updates when the Apply button is pressed in the Pedestrian Properties window.

Pedestrian Parameters
Mode: select pedestrian behavior type
Active: If not active, the pedestrian move once the simulation starts. If active, the pedestrian will wait and only move once the ego-vehicle is a distance of AD meters away.
Loop: the pedestrian actor will return to its initial position and move repeatedly.
AD (m): active distance - distance from which the ego-vehicle will trigger pedestrian movement.
MD (m): move distance - how far the pedestrian will travel.
Speed (km/h): pedestrian movement speed (animations do not yet reflect how fast the pedestrian is moving).
Rotation (deg): The pedestrian actor’s heading w.rt. the map’s coordinate system.
Standard Point: The point from which the distance to the ego-vehicle is calculated. This standard point spans from the pedestrian’s movement trajectory.
0is the origin point,1is the trajectory endpoint.ExampleIn the screenshot above, the pedestrian will move 10m at a speed of 15km/h, should the ego-vehicle approach nearer than 20m from the standard point.Behavior: This defines the behavior of the pedestrian.
NORMAL: This is a basic mode
LOOKPHONE: The pedestrian is looking at the phone on this mode.
Calling: The pedestrian is having a phone call.
Reference Video
Motion Pedestrian
Pedestrian Motion Parameters
Pedestrian Mode Type: select pedestrian behavior type
ONCE: The pedestrian becomes idle upon reaching its initial destination.
CLOSE LOOP: The pedestrian is deleted upon reaching its destination.
REPEAT: After reaching the destination, the pedestrian model teleports back to its starting point, then repeats its movement.
LOOP: Makes a round trip back to its departure point after reaching its destination
NEW PATH: If there are multiple destinations, the pedestrian will search for another destination and travel to it.
STAND: Stands in place
Pedestrian Animation:
Idle: The pedestrian model stands in an idle position
BT_IdleWalk: Uses a standard walking animation
Run: Uses a standard running animation
Reference Video
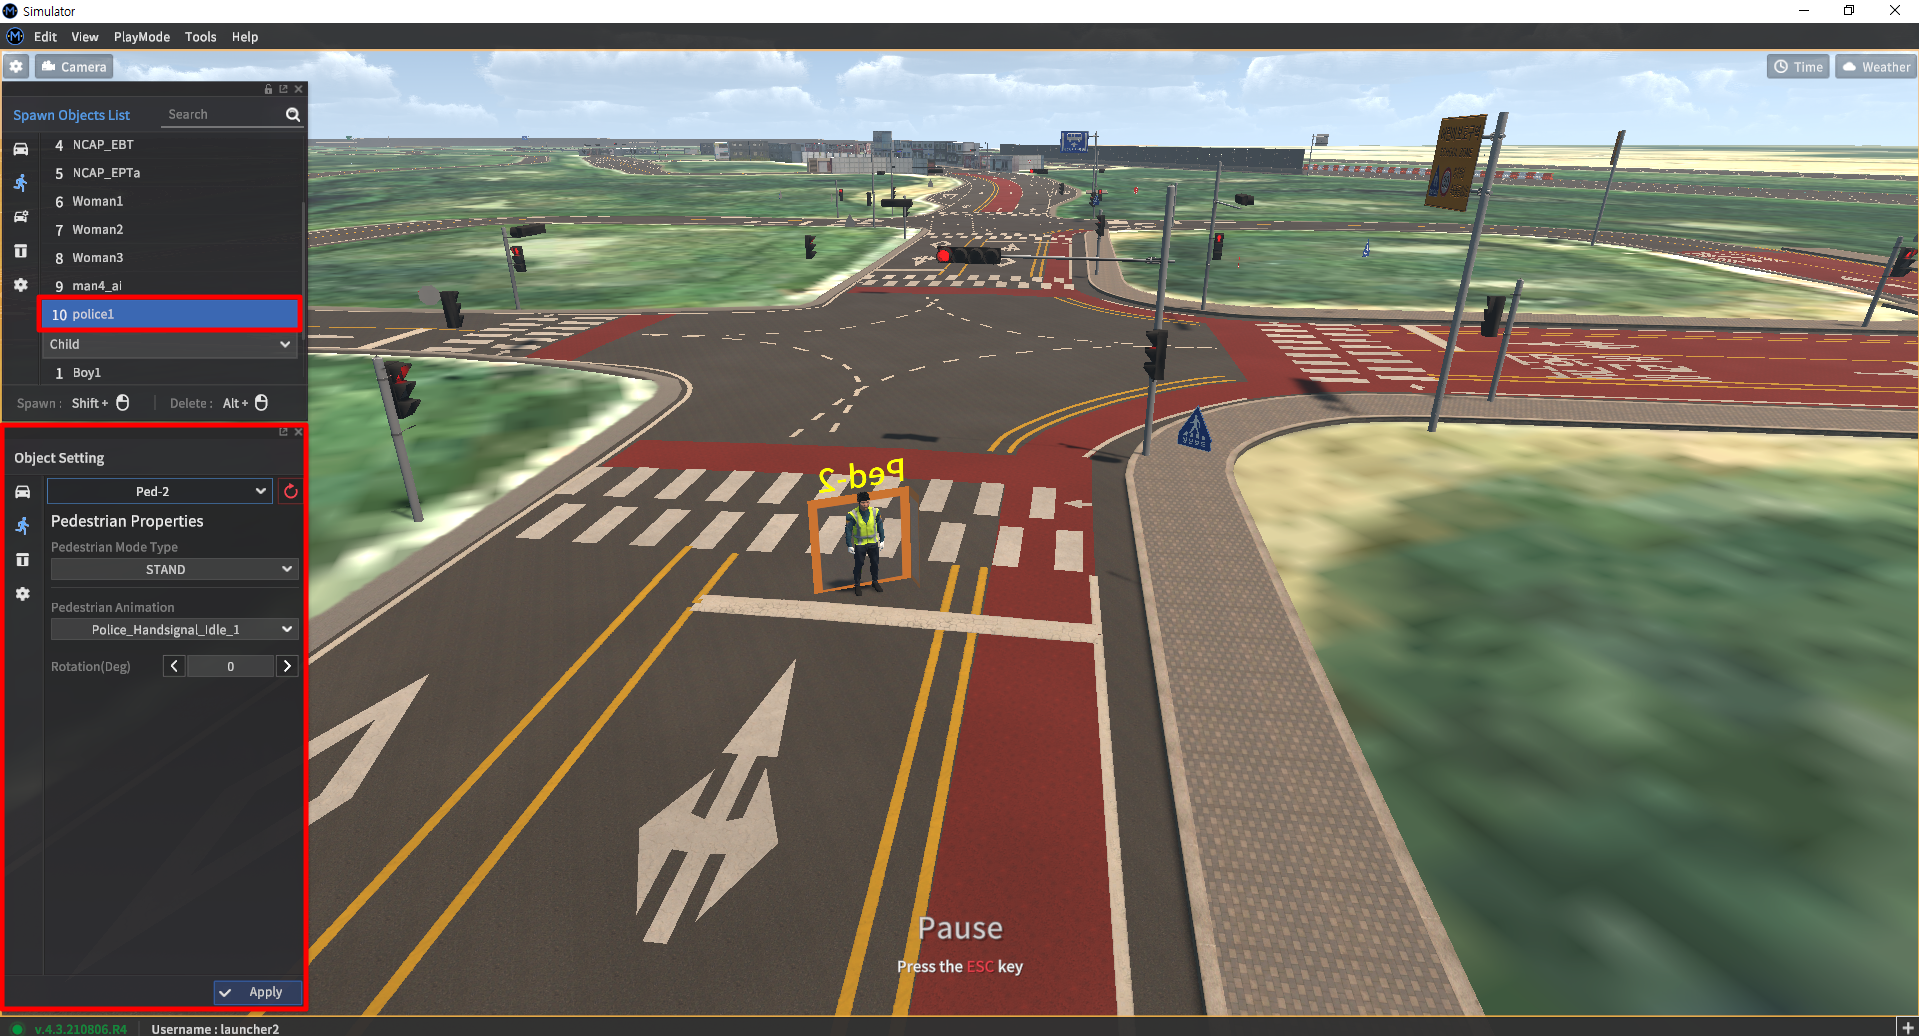
Policeman Model Properties
Pedestrian Mode Type: Not available for policeman models
Pedestrian Animation:
Police_Handsignal_Idle_1
Police_Handsignal_FStop
FStop
FtoR
BtoL
Police_Handsignal_FandL_Stop (from the receiver’s standpoint)
Police_Handsignal_FandL (from the receiver’s standpoint)
Police_Handsignal_LRStop
LRStop
RtoB
LtoF
Police_Handsignal_RtoL
RtoL
LtoR
Police_Handsignal_FtoB
FtoB
BtoF
Pedestrian SpawnPoint
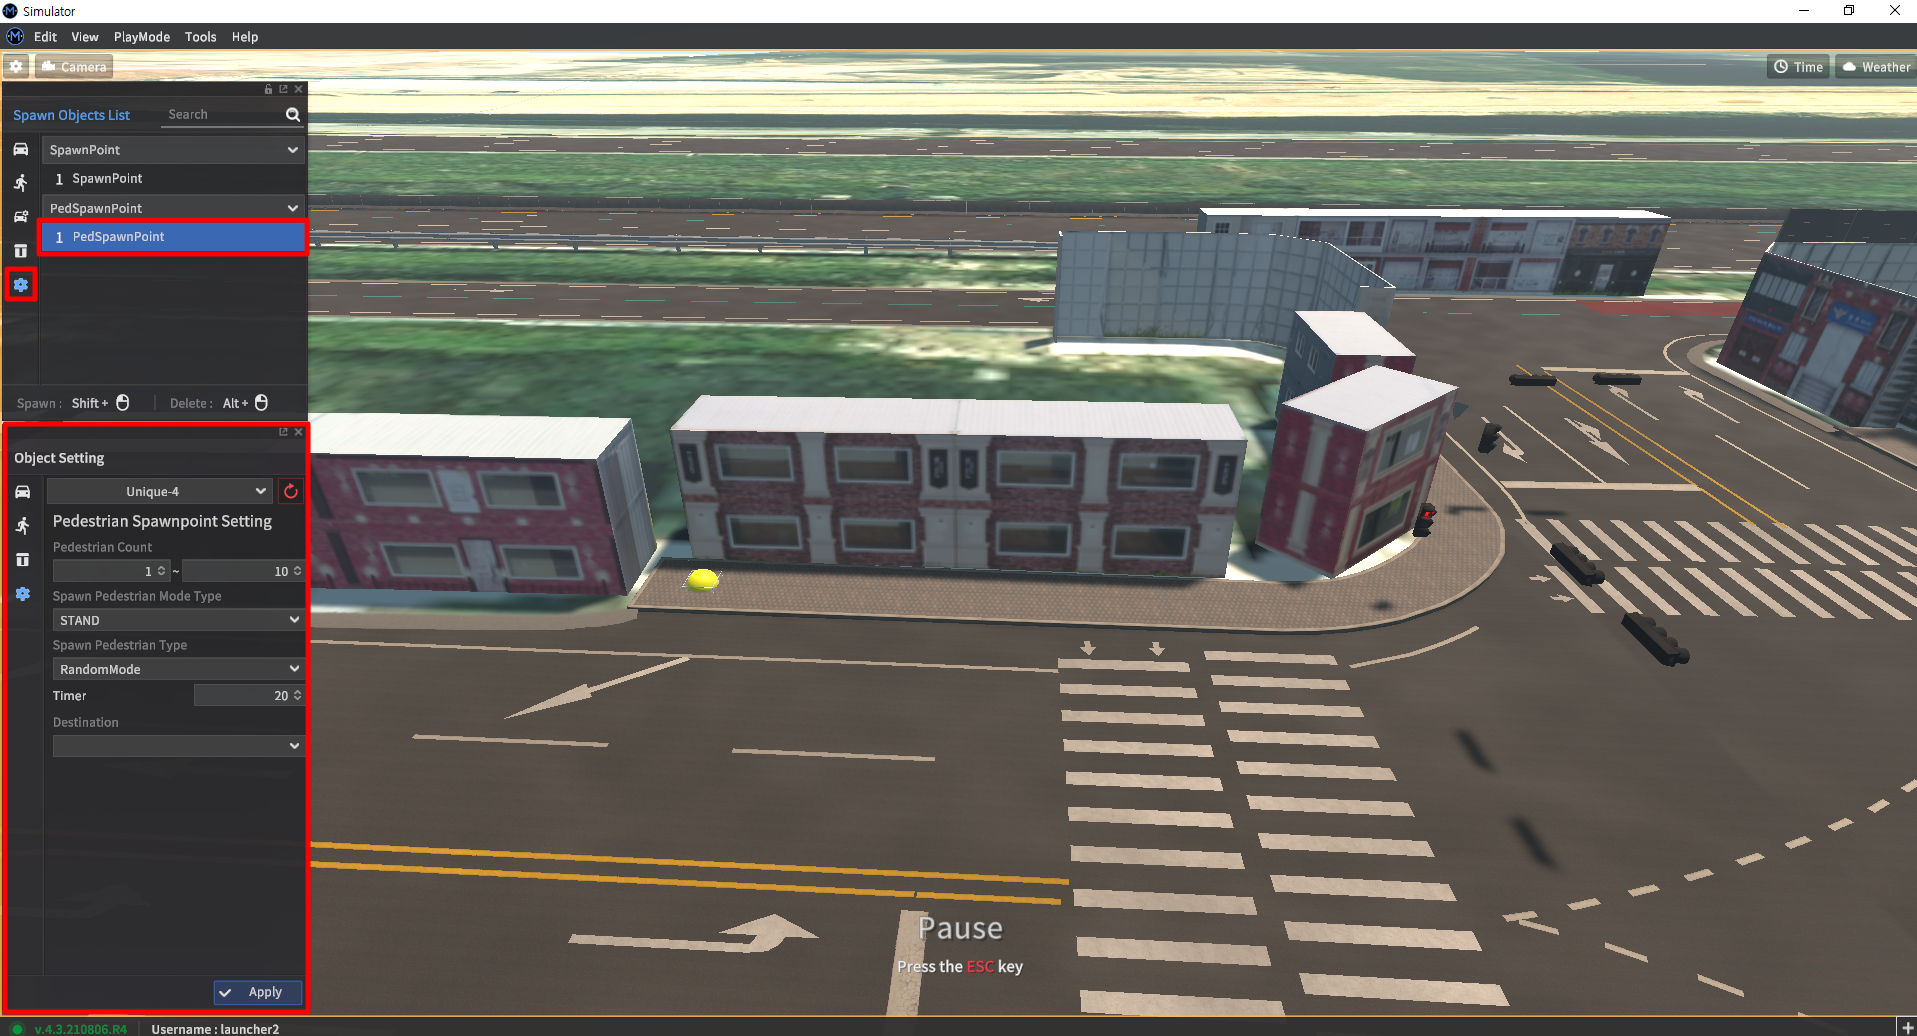
Spawn Objects List - Spawn Point icon clicked (Available on KATRI map crosswalk..)Sele
Select PedSpawnPoint
Shift + left click to create a sponsor point, Ctrl + left click to create a destination point, Alt + left click to delete.
PedSpawnPoint parameter (this paramater is available on “[pedestrian_name]_ai” mode)
Pedestrian Count : Designate the number of Pedestrian spawned.
Pedestrian Mode Type : Select Pedestrian behavior type
ONCE - Switch the status to idle once the destination is set.
CLOSE LOOP - Delete the loop once the destination is reached.
REPEAT - Repeat its process once the destination is reached by teleporting.
LOOP - make a round trip from its departure and destination
NEW PATH - If there are multiple destinations, find another destination when you first reach it.
STAND - stand in place
Spawn Pedestrian Type : Select Pedestrian type
Timer : Assign the time period of Pedestrian spawned.
Destination : Designate the Destination point.
Object Placement
Spawn Objects List - Select Object Icon
Select the desired Object type.
Shift + Left click to create and Alt + Left click to delete
You can modify the location and angle of Object.
Select POS and ROT and drag and drop to move the object position / rotate.
POS XYZ : Select the axis (X, Y, Z) you want to modify, enter the value, and click '<' or '>' to modify the object position.
e.g : Move X by 10
ROT PYR : Select the axis (P, Y, R) you want to modify, enter the value, and click '<' or '>' to modify the object angle.
e.g : Pitch 45 degree rotation
Shaded Area Placement
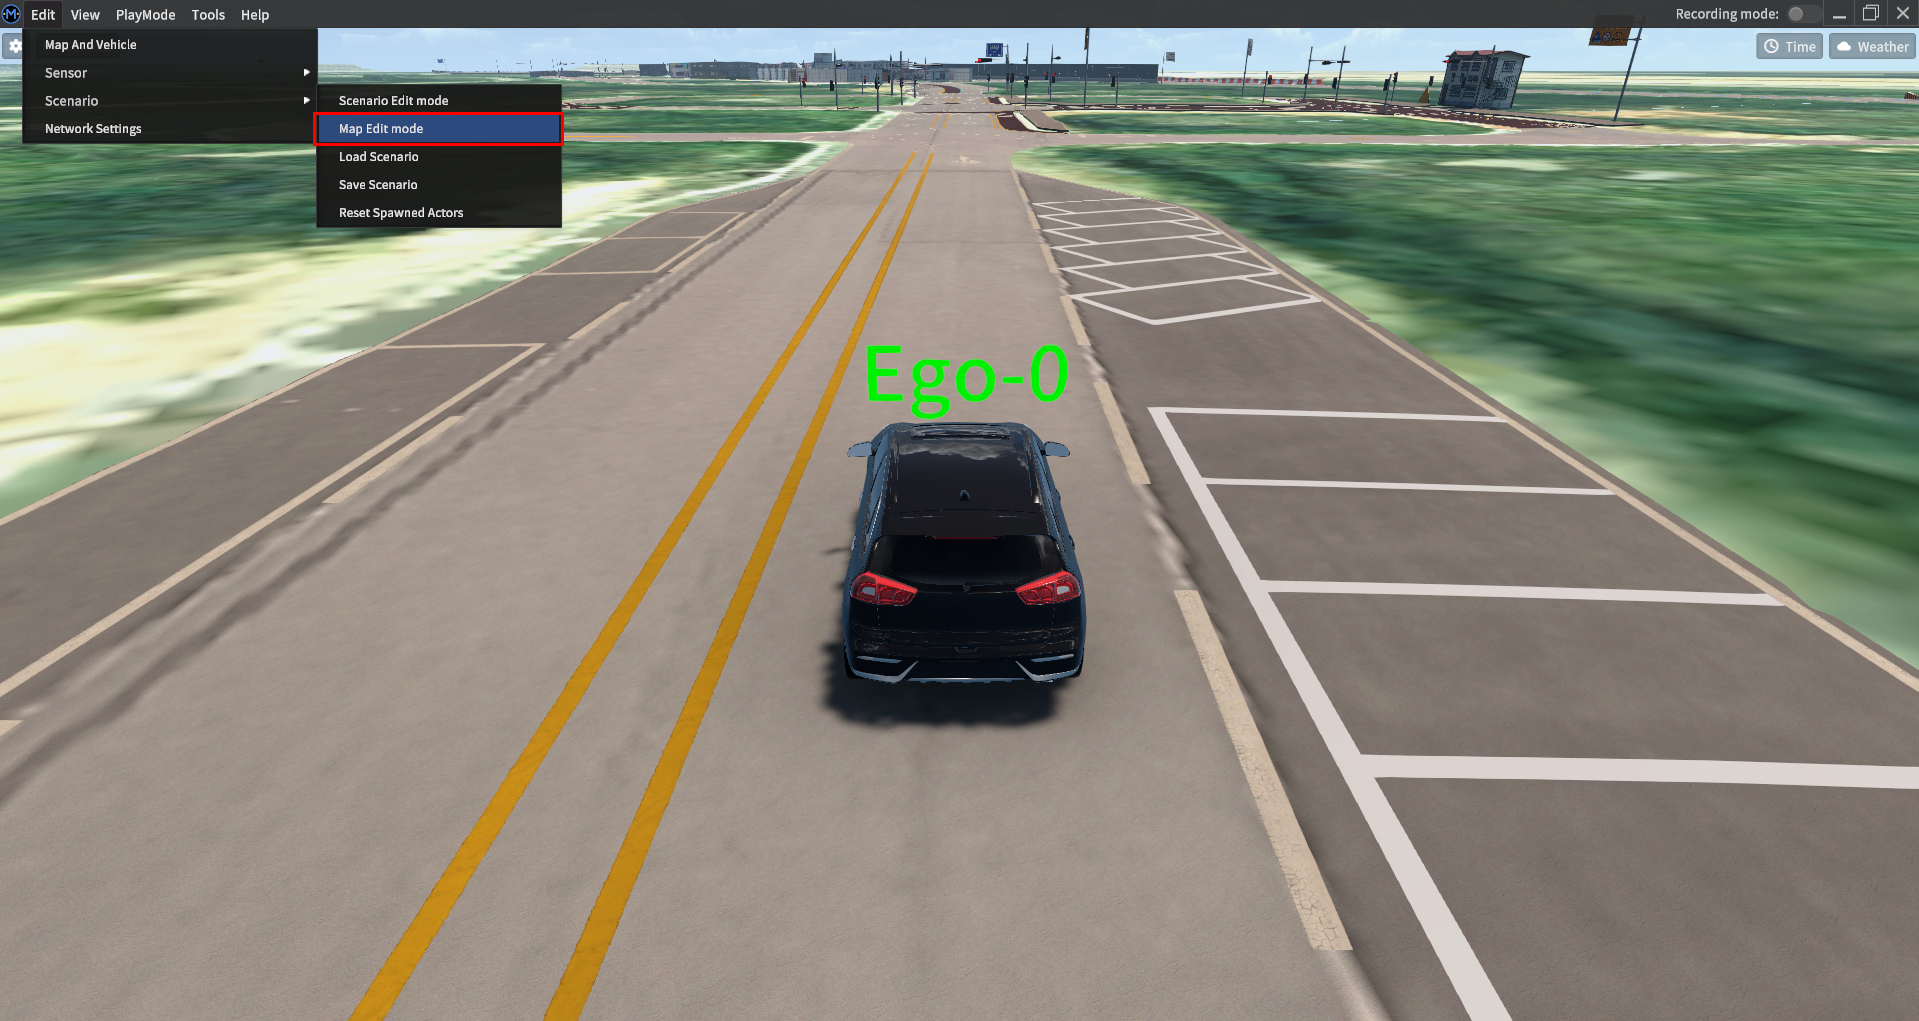
Select Edit - Scenario - Map Edit mode.
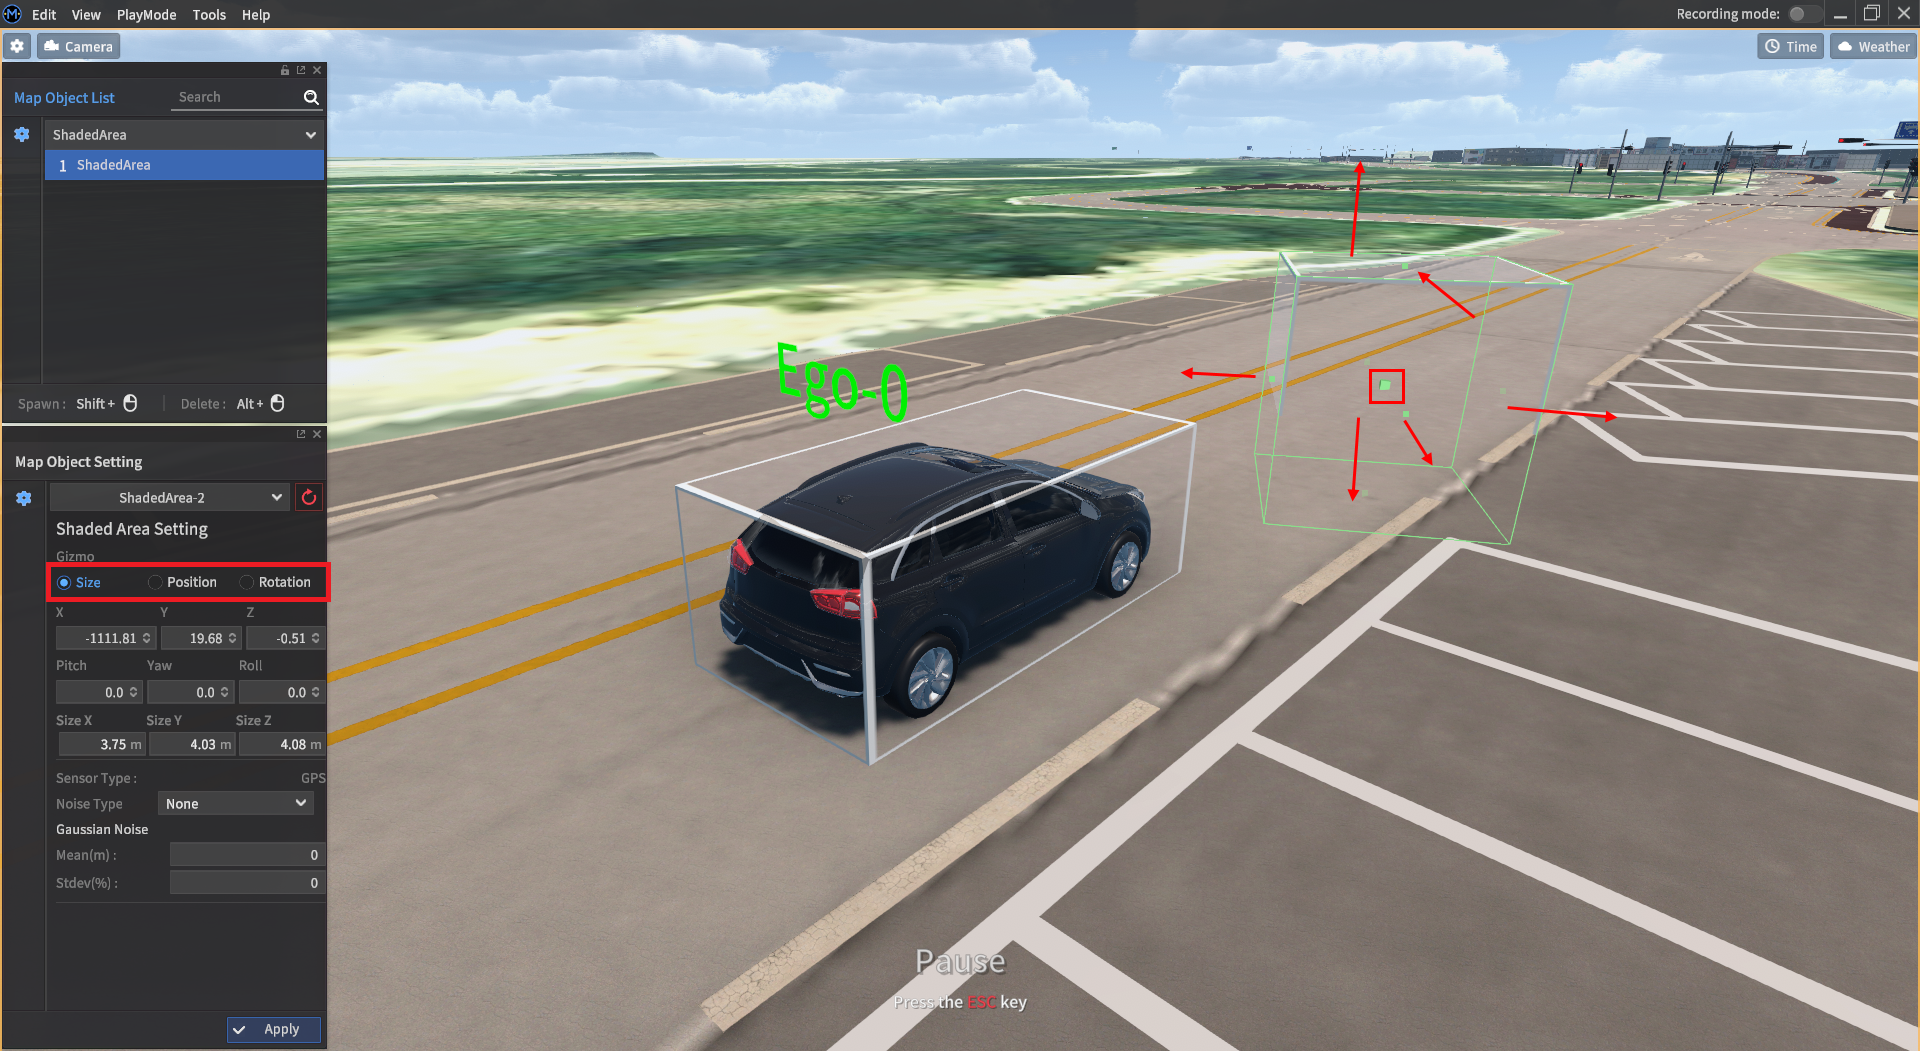
Select ShadedArea.
Shift + Left click to create. Alt + Left click to delete.
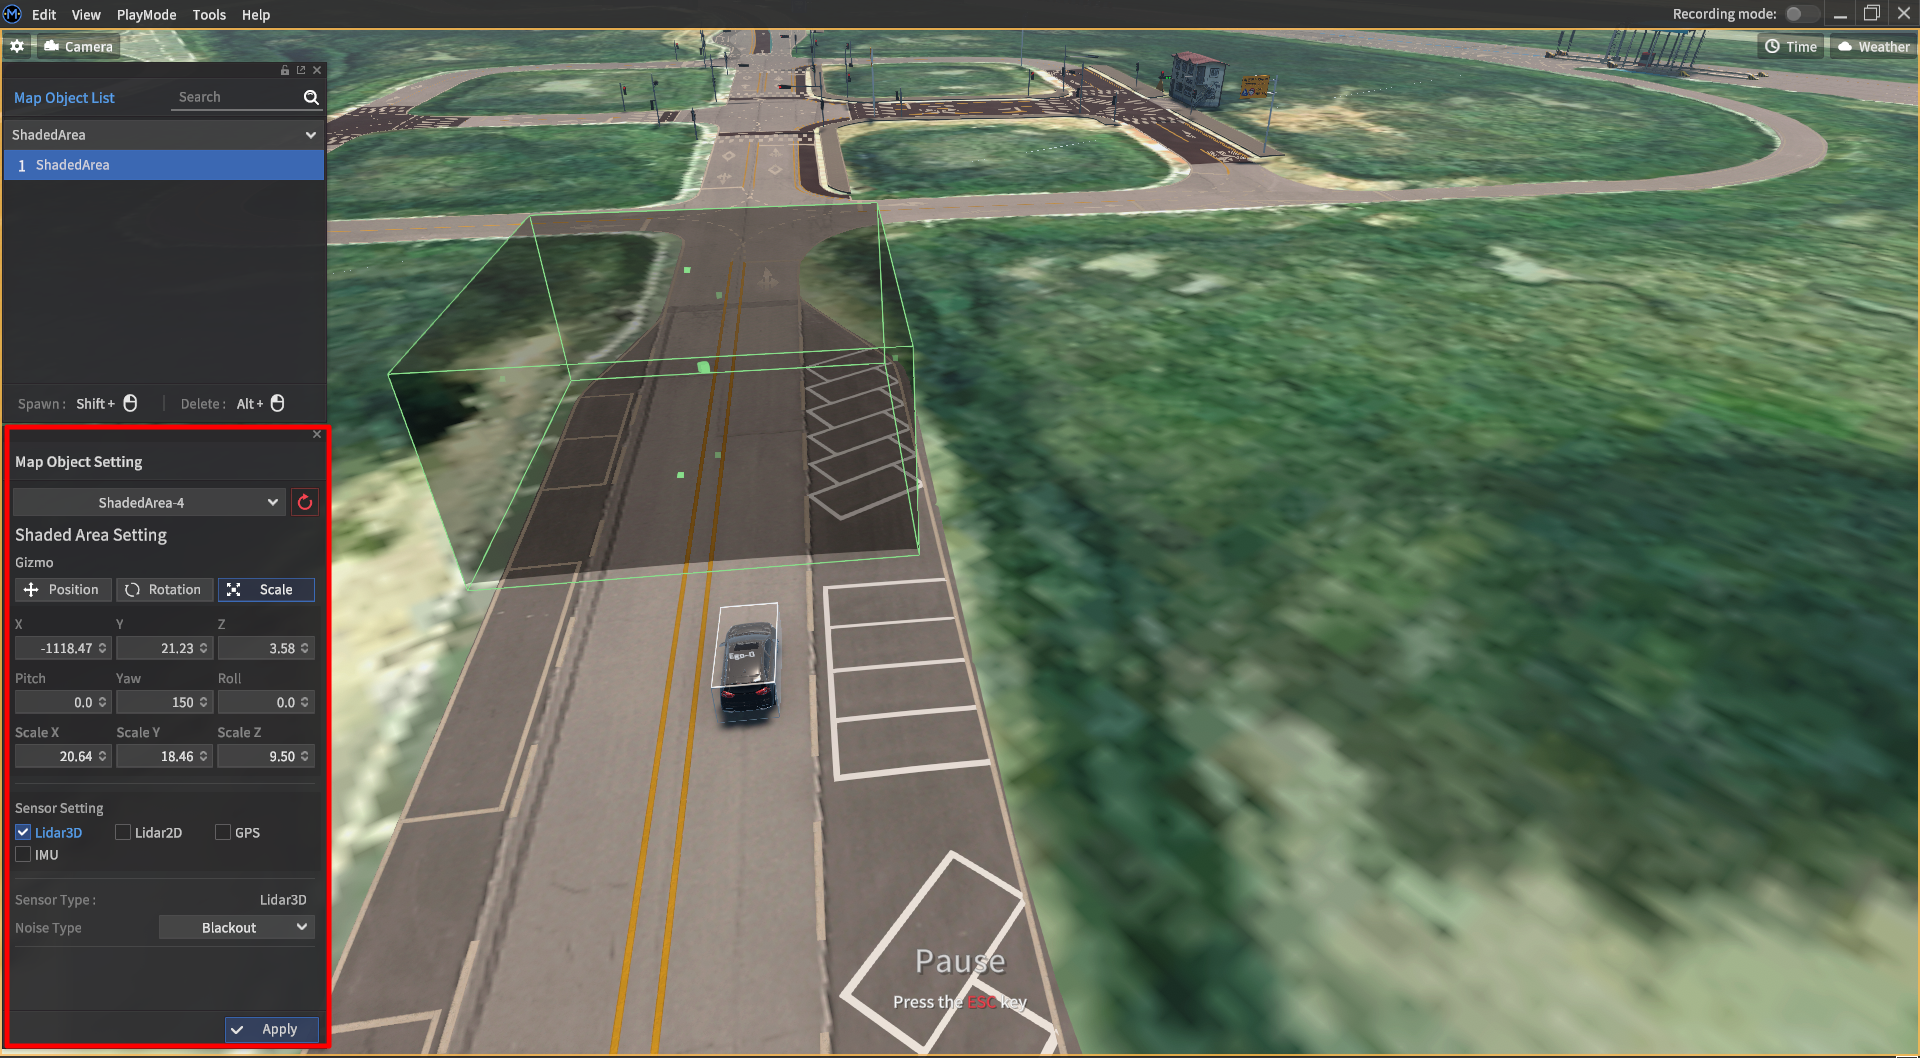
Size, position, and rotation items of Shaded Area can be modified.
After selecting Size, Position, and Rotation, Shaded area size adjustment/position movement/rotation is possible by dragging and dropping
POS XYZ : Select the axis (X, Y, Z) you want to move. Modify the position by entering a value or clicking, dragging, and dropping.
e.g : Move by X 10
ROT PYR : Select the axis (P, Y, R) you want to modify. Modify Rotation by entering a value or clicking, dragging, and dropping.
e.g : pitch 45 degree rotation
Size XYZ : Select the axis (Size X, Y, Z) you want to modify the size. Modify the size by entering a value or clicking, dragging, and dropping.
e.g : Change size to Size X 2.0m
Sensor Type only supports GPS.
You can select None/Shading/Noise within the Noise Type.
GPS Info can be checked according to the shade section noise type through View-Sensor List after GPS Sensor deployment.
When setting None in the Noise Type, there is no change in GPS output value.
When Shading is set within the Noise Type, Latitude, Longitude, and Altitude’s outvalues are 0s.
After selecting Noise in Noise Type, GPS output values are changed according to Mean and Stdev inputs in Gaussian Noise.
Scenario Management
Saving Scenarios
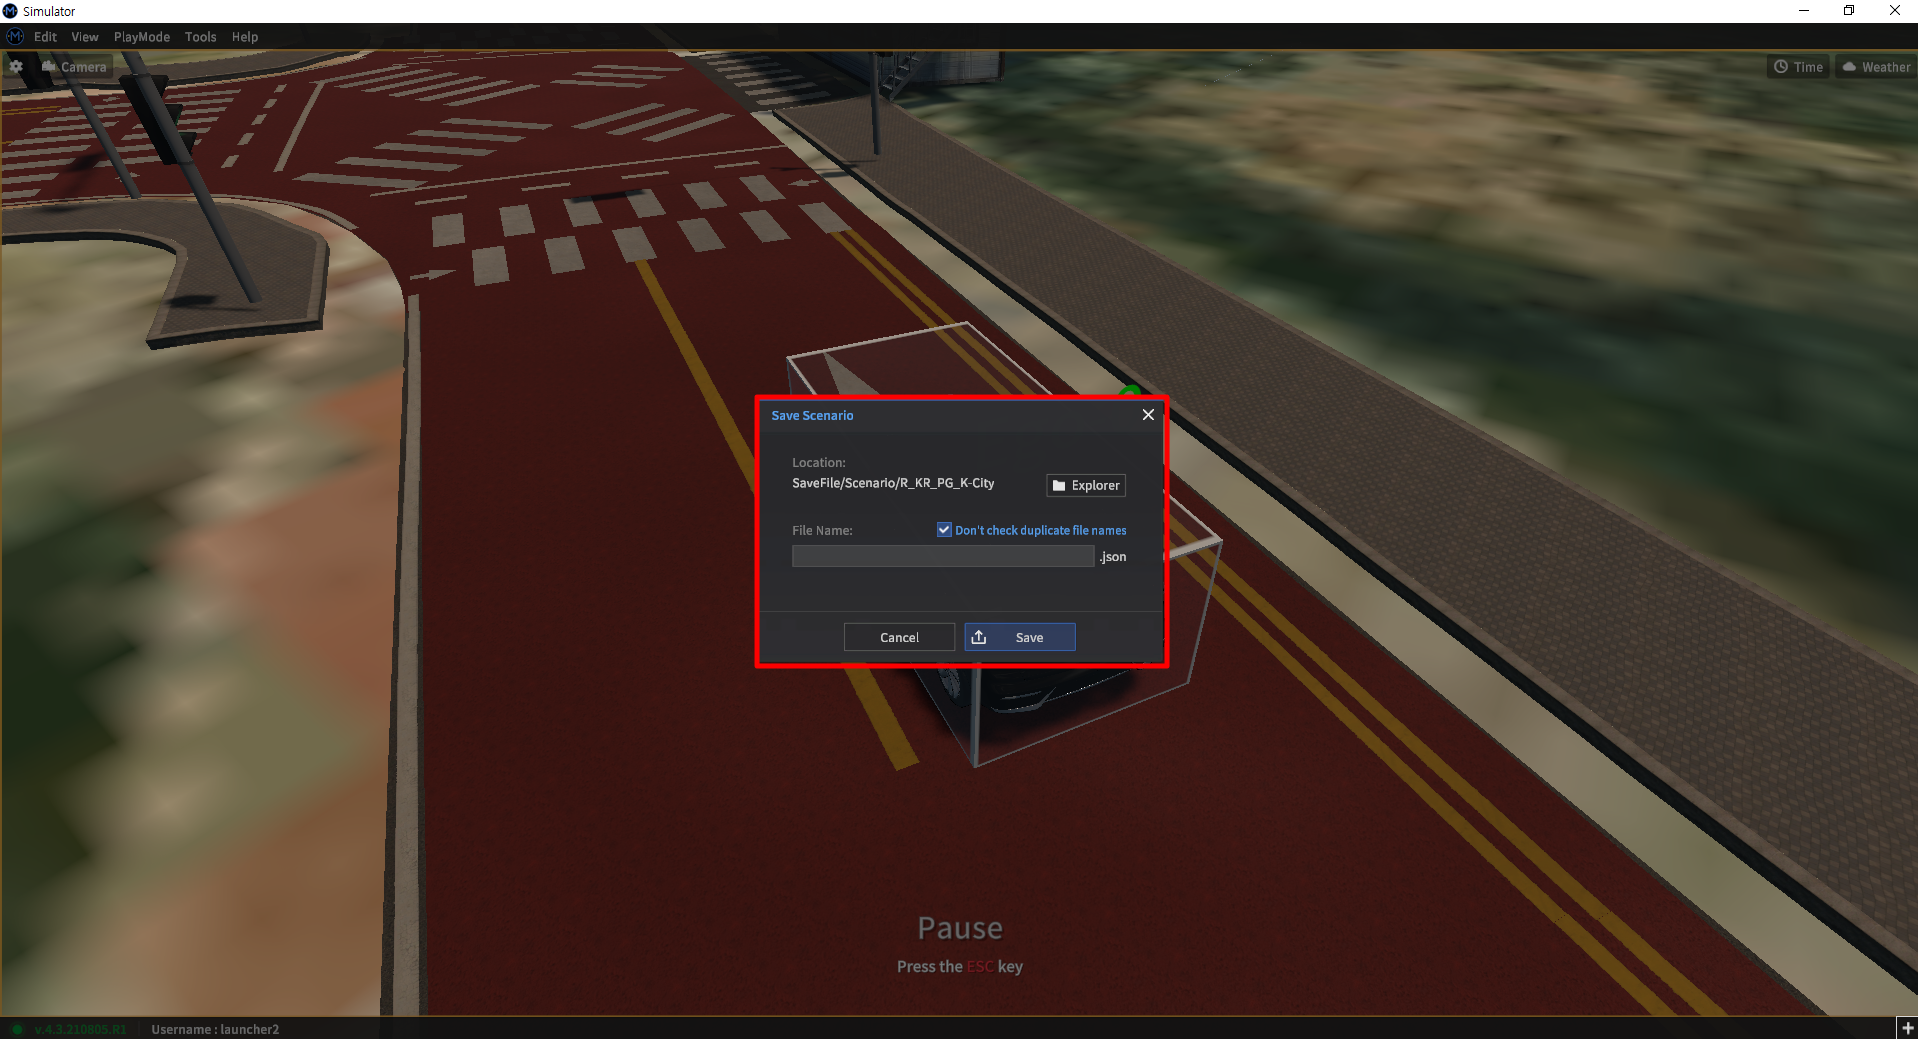
Click Spawn Objects List - Scenario - Save Scenario
Currently, information on one's own vehicle, vehicle, pedestrian, and obstacle can be stored.
Loading Scenarios
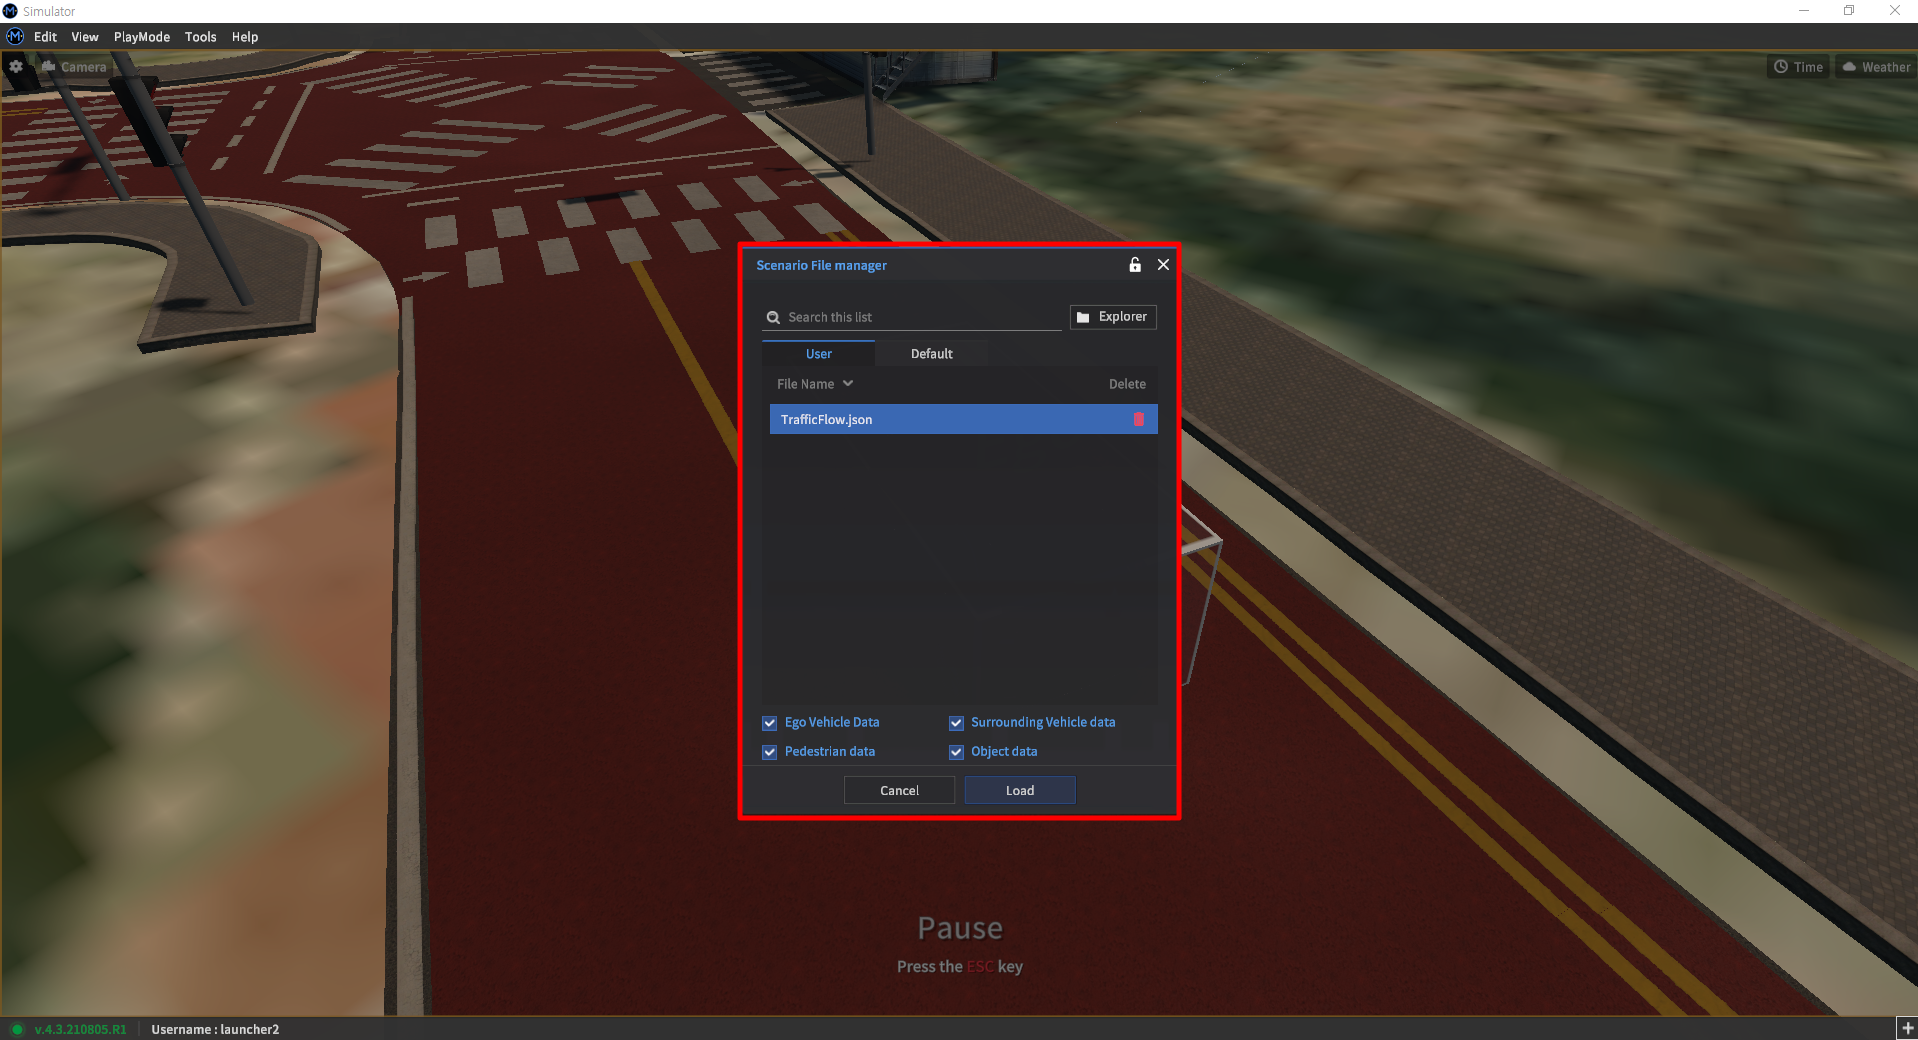
Click Spawn Objects List - Scenario - Load Scenario
Currently, information on one's own vehicle, vehicle, pedestrian, and obstacle can be loaded.
Resetting the Scene
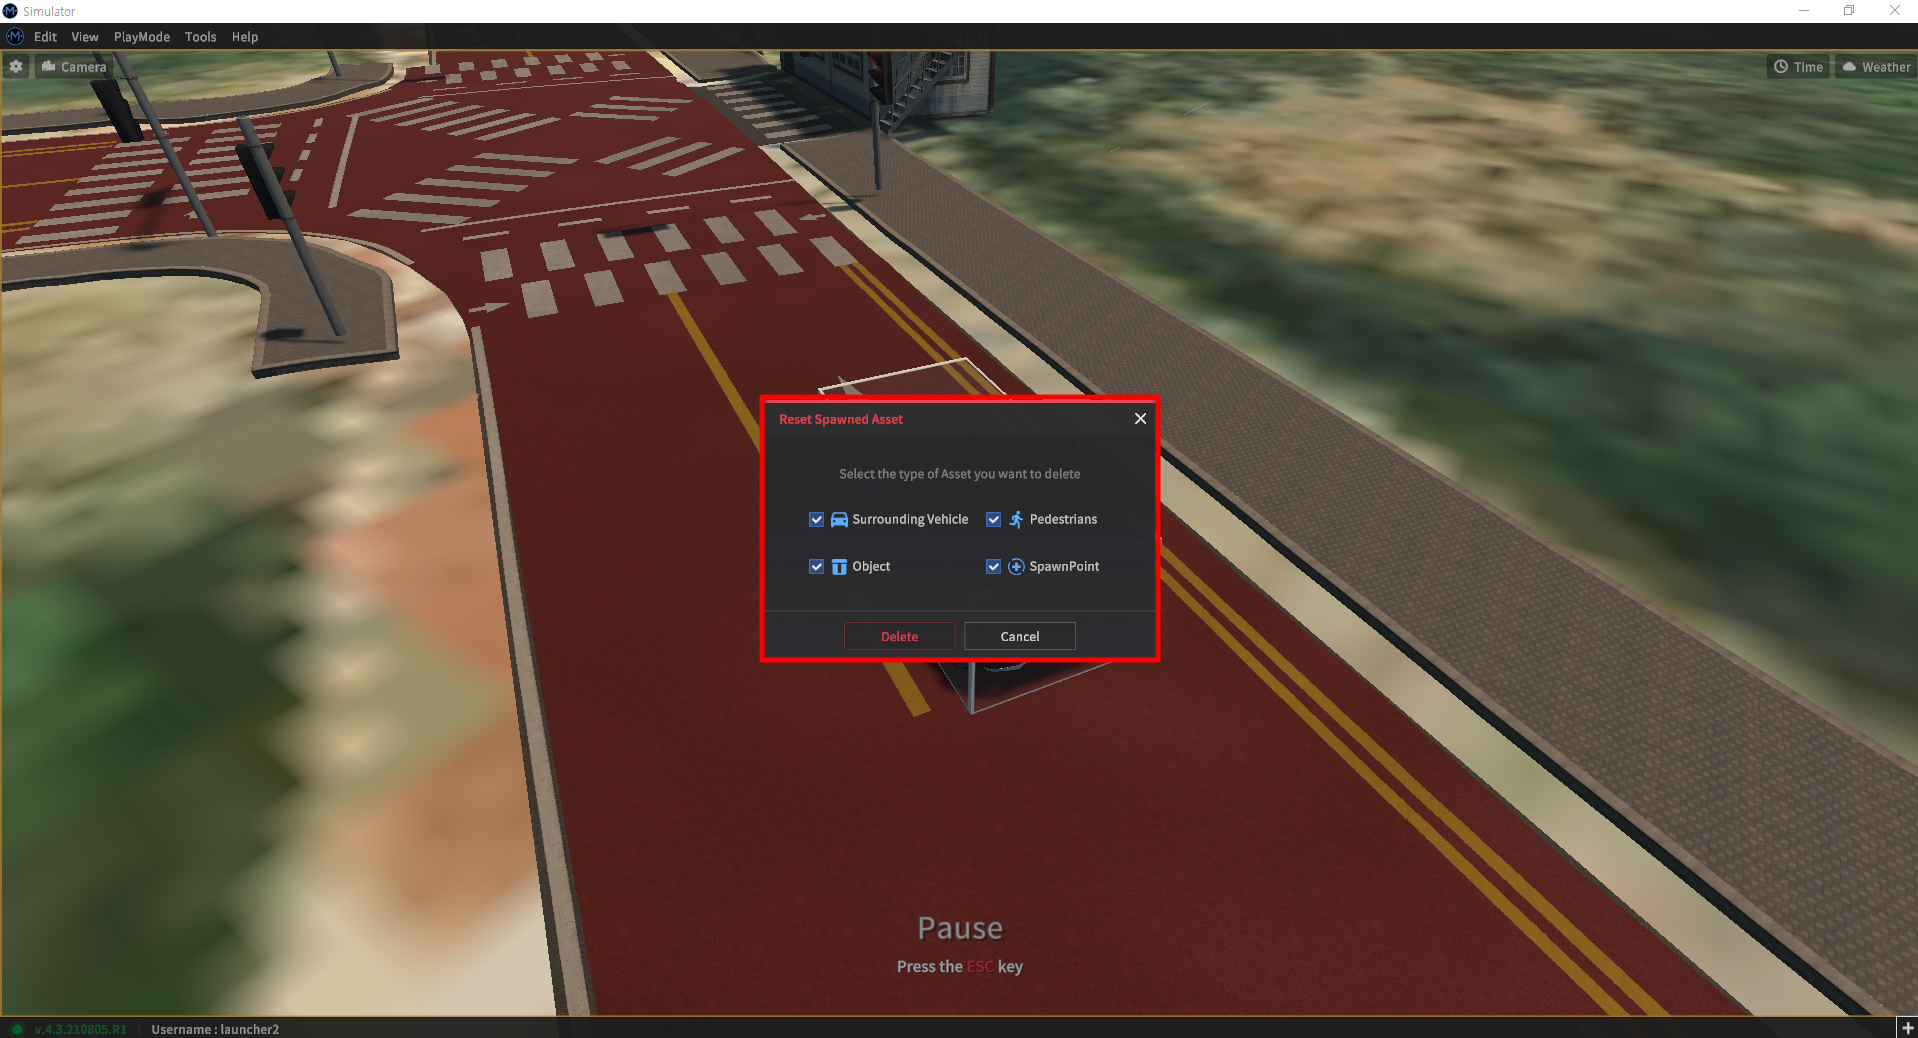
Click Edit - Scenario - Reset Spawned Actors
All vehicles, pedestrians, and obstacles in the current map may be collectively initialized.